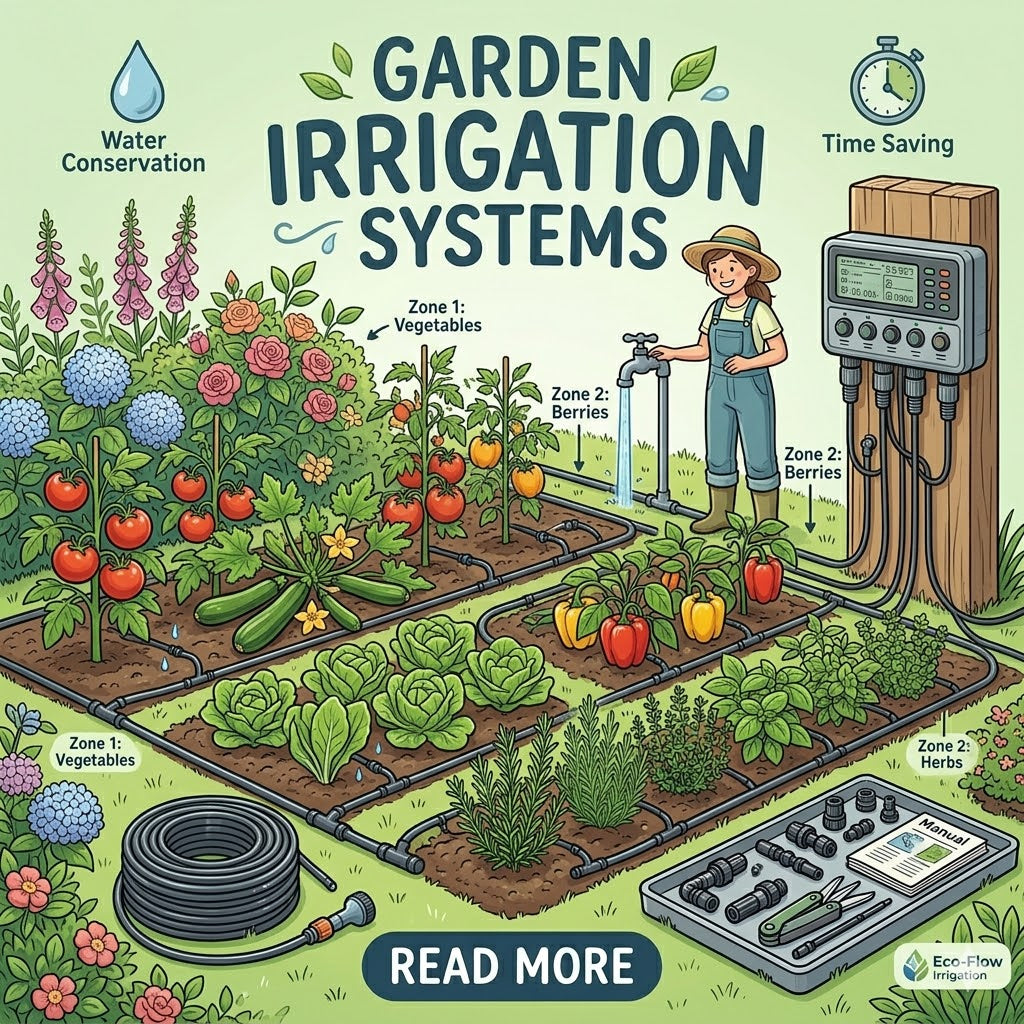
Hozelock Automatic Watering
Imagine returning from your 2026 summer holiday to find your hydrangeas crisp and your lawn yellow because the British heatwave peaked while you were away. It's a common frustration for UK gardeners who rely on manual watering or basic hoses that waste up to 50% of their water through runoff and evaporation. You don't have to choose between a relaxing break and a thriving garden when you invest in a professional hozelock irrigation setup. We've spent over 15 years specialising exclusively in these systems because we know that the right equipment transforms gardening from a chore into a joy.
We understand that looking at a wall of timers, drippers, and 13mm pipes can feel overwhelming, especially when you're worried about leaks or component compatibility. This guide will help you master the Hozelock ecosystem to build a water-efficient, time-saving system tailored perfectly to your outdoor space. You'll learn how to select the right components to lower your water bills and achieve a "set and forget" garden that stays lush all year round. We'll walk you through everything from choosing smart controllers to installing discreet drip lines that deliver water exactly where your plants need it most.
Key Takeaways
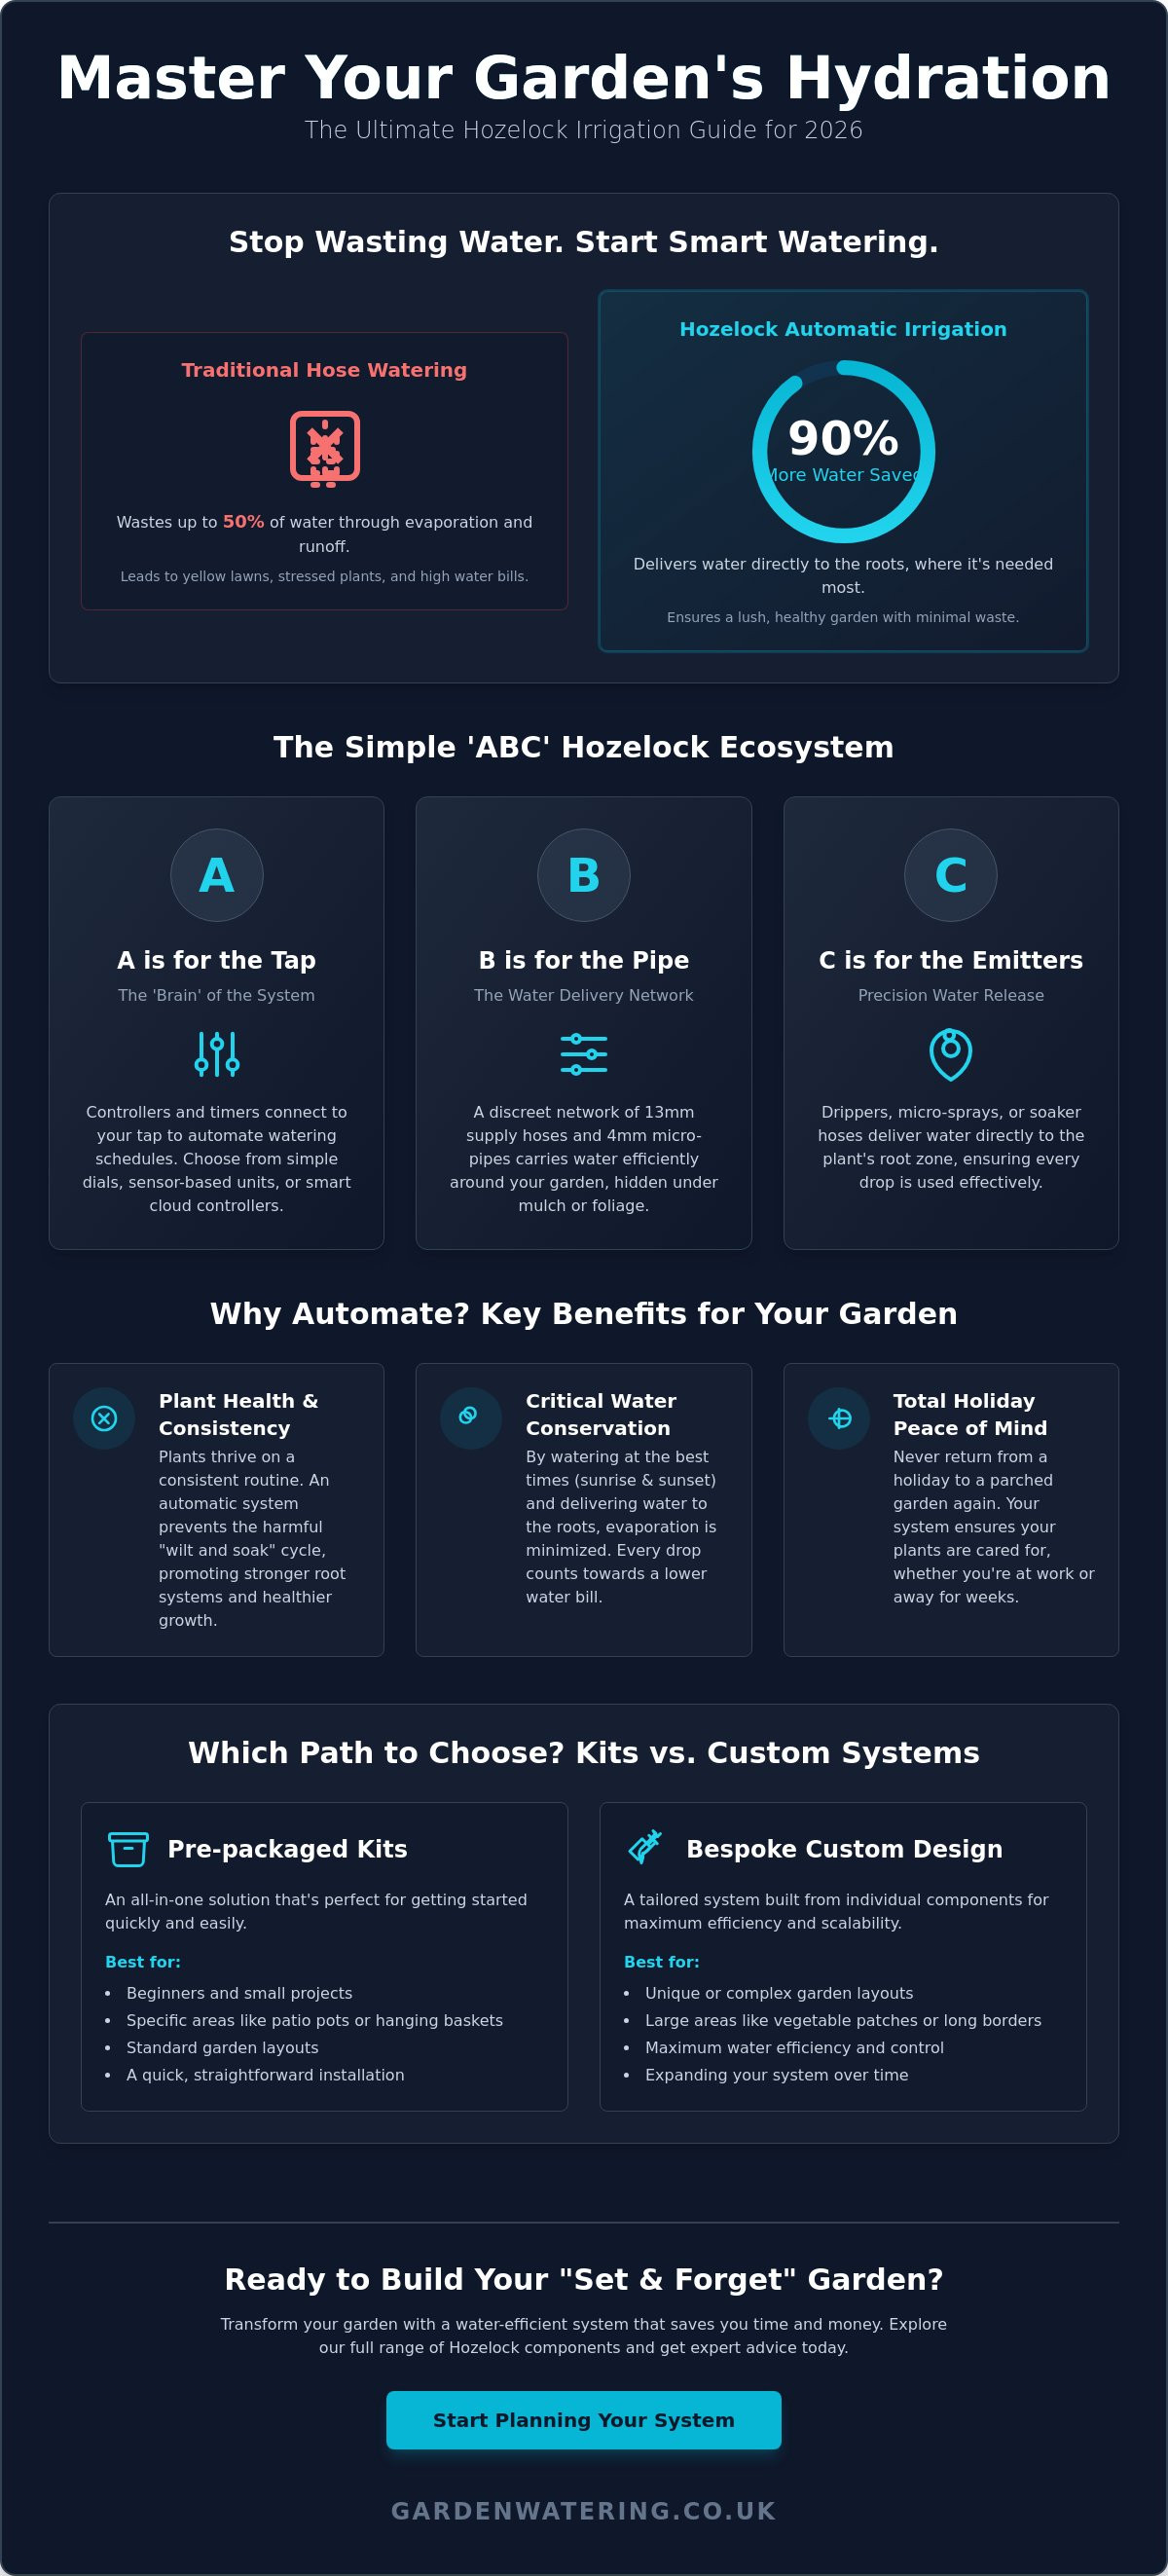
- Discover how a modular ecosystem can save up to 90% more water than a manual hose while ensuring your plants receive precise hydration.
- Learn to choose between advanced sensor-based controllers and essential pressure regulators to build a durable hozelock irrigation system.
- Identify whether a pre-packaged watering kit or a bespoke custom design is the most efficient choice for your garden’s unique layout.
- Master professional installation and maintenance techniques, from softening pipes for easy fitting to preventing limescale buildup in hard water areas.
Understanding the Hozelock Irrigation Ecosystem
Hozelock irrigation represents the gold standard for UK gardeners who want a lush, thriving outdoor space without the daily chore of manual watering. It's a modular, automatic system designed to scale from a few patio pots to a full-sized vegetable plot. Since its founding in 1959, the brand has grown into a household name. You can explore the Hozelock company background to see how they became market leaders in domestic watering solutions. Their core philosophy focuses on precision and efficiency. By delivering water directly where it's needed, these systems can save up to 90% more water compared to using a traditional garden hose.
To better understand how this system works in a real garden setting, watch this helpful video:
The entire ecosystem is built on a logical "ABC" structure that makes it accessible for beginners. Many UK gardeners choose hozelock irrigation because it simplifies a complex task into three manageable components:
- A is for the Tap: This includes the controller or water timer that connects to your outdoor tap. It acts as the brain of the system, deciding exactly when and for how long the water flows.
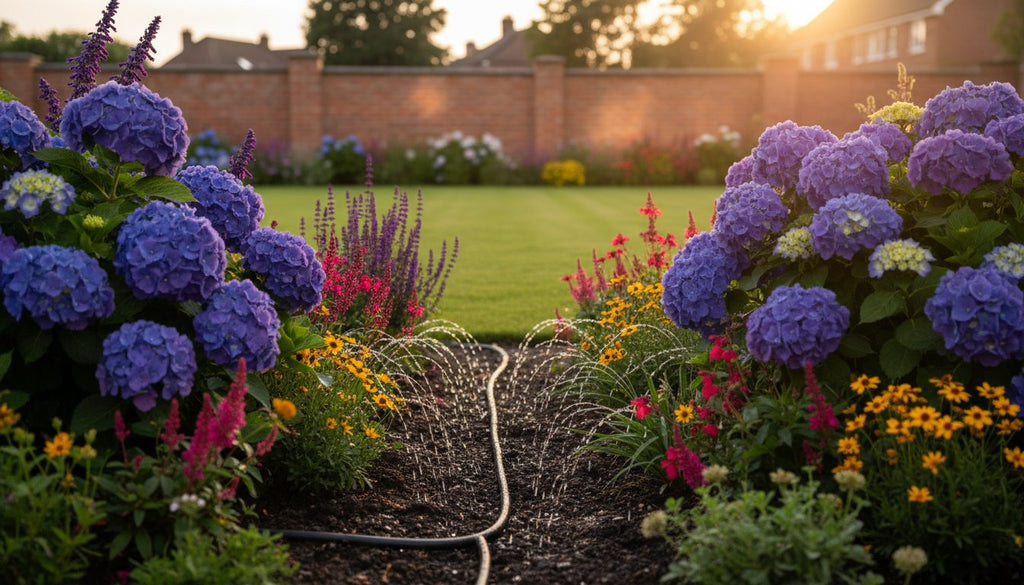
- B is for the Pipe: This is the network of 13mm supply hoses and 4mm micro-pipes that carry water around your garden. It's designed to be discreet, often hidden under mulch or behind foliage.
- C is for the Emitters: These are the drippers, micro-sprays, or soaker hoses that release water to your plants. They ensure hydration reaches the root zone rather than just wetting the leaves.
The Benefits of Automatic Watering in 2026
Consistency is the primary driver of plant health. Plants thrive on routine, and small, frequent doses of hydration prevent the "wilt and soak" cycle that stresses root systems. In 2026, water conservation is more critical than ever. Targeted delivery at the root zone minimizes evaporation, ensuring every drop counts. This approach is particularly effective during dry spells where traditional spraying is wasteful. Plus, you get total holiday peace of mind. Whether you're at work or on a two-week break, your garden continues to thrive without any manual intervention.
Is Hozelock Irrigation Right for Your Garden?
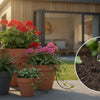
One of the best features of this system is its sheer versatility. It's perfectly suited for thirsty hanging baskets, patio pots, vegetable patches, and flower borders. You don't need to install a massive system all at once. The beauty of the hozelock irrigation range lies in its scalability. You can start with a simple kit for your most prized containers and expand the network as your garden grows or your budget allows. It's a professional-grade solution that's been simplified for home use.
Expert Tip: For a deeper dive into planning your setup, check out our Hozelock Automatic Watering System: The Ultimate 2026 UK Guide.
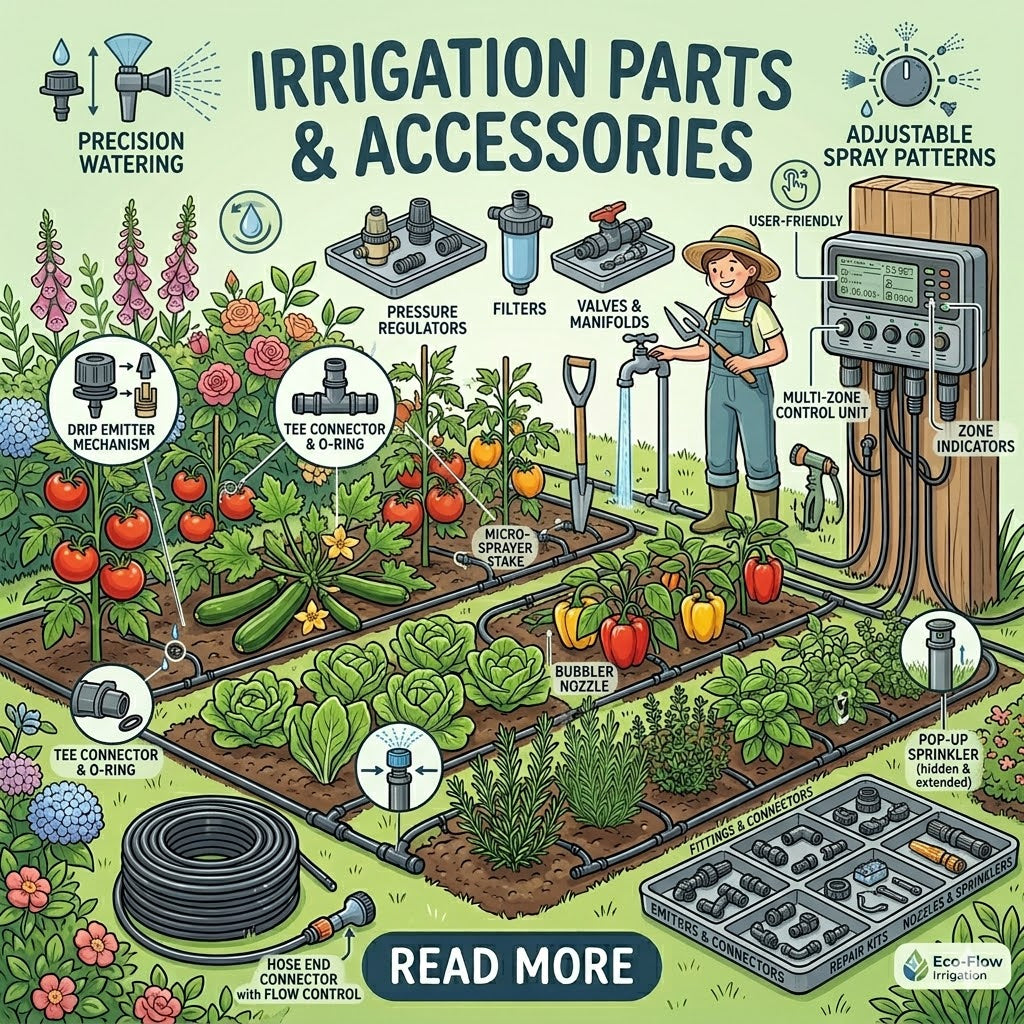
Core Components: The Building Blocks of Your System
Building a reliable hozelock irrigation system requires a clear understanding of how water moves from your outdoor tap to the soil. Every component serves a specific purpose in managing pressure and ensuring every plant receives the correct amount of hydration. By choosing the right combination of timers, pipes, and emitters, you create a professional-grade setup that lasts for years.
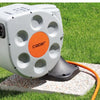
Hozelock Water Timers and Controllers
The controller acts as the brain of your setup. You can choose a simple mechanical dial or move towards advanced automation. Sensor Controllers are particularly effective because they use integrated light sensors to trigger watering at sunrise and sunset. These are the two best times of day to minimise evaporation and prevent leaf scorch. For those who want total control, Cloud Controllers connect to a home hub, allowing you to adjust schedules via a smartphone app from anywhere in the world. It's a reliable way to ensure your garden stays lush while you're away on holiday. You can Browse Garden Irrigation Water Timers to find the right fit for your schedule.
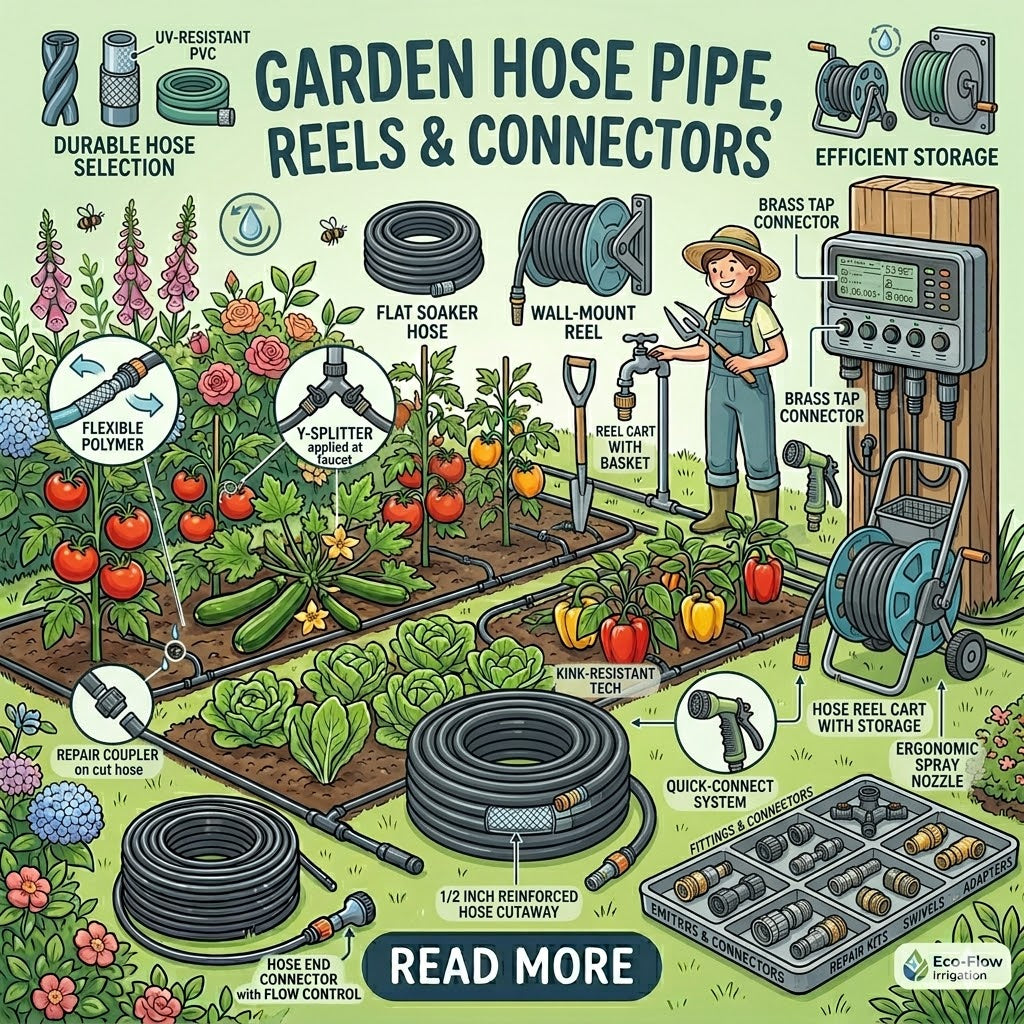
Pipeline and Connectors
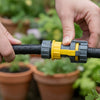
A pressure regulator is a non-negotiable component for any micro-irrigation layout. Without it, high domestic water pressure can pop micro-fittings apart or cause uneven flow. Your main network uses 13mm UV-stable LDPE supply pipe, which is designed to withstand the British winter without cracking. From this main line, you'll use 4mm micro-pipes to reach individual pots or baskets. Hozelock's Easy Drip system is a specific range of fittings designed for tool-free installation, making it simple to push and click components into place without straining your hands. Using high-quality elbows, tees, and end-plugs ensures a leak-free layout that maintains consistent pressure throughout the entire run. To see the full range of options, Explore Hozelock Connectors for your project.
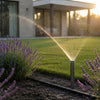
Drippers and Micro-Jets
Emitters are the final point of delivery in your hozelock irrigation network. For containers and individual shrubs, adjustable drippers are the most efficient choice. These allow you to fine-tune the flow rate from 0 to 40 litres per hour (LPH), catering to the specific needs of different plant species. If you're watering larger areas like flower beds or greenhouse benches, micro-sprays and mini-sprinklers provide broader coverage. These units can throw water in 90, 180, or 360-degree patterns to ensure no dry spots remain. Selecting the right emitter helps you save water by placing it exactly where the roots can reach it. If you're unsure where to start, you can find inspiration by looking at design ideas and plans from our expert team.
Planning Your Layout: Kits vs. Custom Systems
Every successful garden starts with a solid foundation. Before you buy a single component, you must calculate your water budget. This is the volume of water your outdoor tap can deliver, which determines how many drippers or sprinklers your hozelock irrigation system can support at once. To find your flow rate, time how long it takes to fill a 10-litre bucket. If it takes 40 seconds, your flow rate is 15 litres per minute. This data prevents the common mistake of over-extending a system, which leads to weak pressure and dry plants at the end of the line.
Zoning is the next step in professional planning. Don't try to water your entire garden on one single circuit. Instead, divide your outdoor space into zones based on plant needs and location. A sunny south-facing border requires more frequent hydration than a shaded patio. By creating separate zones, you can tailor your watering schedules to ensure every plant thrives without wasting water on damp soil.
- Zone 1: High-intensity pots and hanging baskets on the patio.
- Zone 2: Established flower borders and shrubs.
- Zone 3: Vegetable patches or greenhouse environments.
Hozelock Watering Kits for Beginners
If you're looking for a quick, reliable solution for a specific area, Hozelock's pre-packaged kits are an excellent choice. These kits are designed for speed and simplicity, containing everything you need to get started in under 30 minutes. The 15-pot and 20-pot kits are perfect for balconies, while the 25-pot kit offers enough components for a standard UK patio. Inside the box, you'll typically find a pressure reducer, 15 metres of 4mm micro-hose, and a selection of stakes and drippers. It's a cost-effective way to trial hozelock irrigation before expanding. You can shop Hozelock watering kits to find the right size for your space.
Designing a Custom Irrigation Plan
For gardens with irregular shapes or complex layouts, a bespoke system offers far better efficiency. Start by mapping your garden on paper, identifying "clusters" of plants that need similar care. The secret to a high-pressure custom system is the 13mm main supply pipe, often called the "spine." Run this spine through the centre of your garden to act as the primary artery, then use 4mm off-takes to reach individual pots or borders. This layout maintains consistent pressure across long distances, ensuring the last dripper performs just as well as the first. For more inspiration, explore these design ideas and plans for irrigation to help you visualise your project.
Step-by-Step: Installing Your Hozelock Irrigation
Setting up your hozelock irrigation system is a rewarding project that transforms how you care for your garden. We know that a methodical approach ensures a leak-free, efficient setup that lasts for seasons. With over 15 years of experience in high-quality watering solutions, we've refined the process into five manageable steps that build a professional-grade system.
Start at your outdoor water source by fitting your Hozelock water timer directly to the tap. It's essential to attach the pressure reducer immediately after the timer. This component is vital because it drops the UK mains pressure to a consistent 1.5 bar. This protects your connectors from popping off and ensures the emitters operate at their designed flow rate. Don't skip this, as high pressure is the most common cause of system failure.
Lay out your 13mm main supply pipe according to your plan. If the pipe feels stiff or retains its coiled shape, soak the ends in a bucket of warm water for 60 seconds. This simple trick softens the plastic, making it much easier to push the connectors into place. Once the plastic cools, it grips the ridges of the fitting to create a permanent, watertight seal.
Use the Hozelock hole punch tool to create precise inlets for your 4mm micro-pipe. This smaller tubing allows for targeted delivery to individual pots or specific shrubs. Keep these micro-pipe runs under 5 metres to maintain adequate pressure at the dripper. Once the layout is set, use plastic stakes every 1.5 metres to keep the pipe in place. If you're running pipe along a wall, use Hozelock wall clips to prevent sagging and maintain a clean look.
The final, critical step is flushing the system. Before you add any drippers or sprayers, turn the water on for 30 seconds. This clear run flushes out any debris or plastic shavings that entered the pipe during installation. Skipping this step is the leading cause of blocked emitters in the first month of use.
Installation Best Practices
Avoid "dead ends" by creating a closed loop with your 13mm pipe where possible. This loop ensures even pressure distribution so plants at the end of the line get as much water as those at the start. You can hide pipes discreetly under 5cm of bark mulch or tuck them along the edge of gravel paths. When using the Hozelock hole punch tool, always keep your fingers away from the back of the pipe and apply steady, vertical pressure to avoid piercing through both sides of the tube.
Testing for Leaks and Coverage
Conduct a "First Run" test by watching every single emitter for at least two minutes. Check that the flow reaches the root zone without excessive runoff. You'll need to adjust your Hozelock timer as the UK weather shifts; a 10-minute daily cycle in May might need to increase to 20 minutes during a July heatwave. For a broader look at different setups, read our Garden Watering Systems UK: The Complete 2026 Irrigation Guide.
Ready to automate your garden? Browse Hozelock Watering Kits to find the perfect foundation for your hozelock irrigation project.
Maintenance and Expert Care: Making Your System Last
Investing in hozelock irrigation is a smart move for any UK gardener, but it isn't a "set and forget" project. To get the best out of your setup, you must adapt to the changing British seasons. In May, your plants are just waking up. They need light, consistent watering to establish roots. By August, the soil dries out significantly faster due to higher evaporation rates. You should increase your timer frequency during these peak months to ensure your borders don't wilt during a heatwave. We understand exactly what your garden needs to thrive, and small adjustments to your schedule can save your plants during a dry spell.
If you live in a hard water area, such as the South East or East of England, limescale is your main enemy. Small 4LPH drippers can become blocked by mineral deposits over a single season. We recommend soaking your drippers in a mild descaling solution or white vinegar once a year to keep the flow clear. Buying from a dedicated specialist ensures you have access to these specific maintenance tips and the right spare parts when you need them. We specialise exclusively in this field, and we're here to ensure your system remains as efficient as the day you installed it.
Winterising Your Hozelock System
UK frosts can be brutal on plastic components. Water expands by approximately 9% when it freezes, which is enough to crack the internal valves of an expensive water timer. Always remove your timer from the tap before the first frost hits in November. Drain any internal water and store it in a frost-free shed or garage. For the pipework, use a manual drain valve at the lowest point of your garden to let gravity clear the lines. In early spring, walk the length of your 13mm supply pipe to check for splits before you turn the tap on for the first time.
Troubleshooting Common Issues
If you notice a pressure drop at the end of a long pipe run, it's often because the system exceeds the maximum flow rate of your tap. You might need to split your hozelock irrigation into two separate zones using a 2-way tap connector. If a fitting "pops" off, it's usually a sign of high pressure or a pipe that wasn't pushed fully onto the barb. Ensure all 13mm pipes are secured with stakes to prevent movement. For more detailed guides on keeping your garden lush and healthy, visit our Hozelock Automatic Watering System Blog. We've spent over 15 years helping UK gardeners, and our expert advice is always just a click away.
Start Your Journey to a Flourishing Garden
At Garden Watering, we understand that every garden has unique requirements. We've spent over 15 years refining our expertise as exclusive Hozelock specialists to provide the trusted advice you need. From selecting the perfect core components to ensuring fast UK delivery on all automatic watering kits, we're here to support your project from start to finish. Don't leave your garden's health to chance when professional solutions are so accessible. It's time to enjoy a lush, healthy outdoor space without the daily chore of manual watering.
Shop the Full Hozelock Irrigation Range at Garden Watering
Frequently Asked Questions
Can I connect a Hozelock irrigation system to a water butt?
Yes, you can connect a Hozelock system to a water butt by using a dedicated Water Butt Pump. This pump provides the 1.1 bar of pressure required to push water through the pipes, as gravity alone won't suffice for most drippers. It's a sustainable way to use harvested rainwater while maintaining the efficiency of your hozelock irrigation setup.
Do Hozelock irrigation systems work during a hosepipe ban?
Drip irrigation systems are generally permitted during a UK hosepipe ban under specific "Temporary Use Ban" exemptions. Most water authorities allow these systems because they're 90 percent more efficient than manual watering. You should always check the latest 2026 guidelines from your local supplier, such as Anglian Water, to ensure compliance with current regional rules.
How many drippers can I run off a single Hozelock timer?
You can typically run up to 30 drippers from a single Hozelock water timer. This ensures the system maintains the 1.5 bar pressure needed for every plant to receive its allocated water. If you try to power more than 30 outlets, you'll likely see a drop in flow at the end of your pipe run.
Is the Hozelock 4mm micro pipe compatible with other brands?
Hozelock 4mm micro pipe is fully compatible with other major brands like Gardena or Antelco. The 4mm internal diameter is an industry standard, so you can mix and match connectors or drippers without leaks. This makes it easy to expand your existing system using high-quality components without needing to replace your entire network of pipes.
How often should I change the batteries in my Hozelock water timer?
You should change the batteries in your Hozelock water timer once every 12 months, ideally at the start of spring. Using fresh alkaline AA or 9V batteries ensures the timer operates reliably throughout the peak 6-month growing season. Most modern units feature a low-battery indicator that'll flash when power levels drop below 10 percent.
Can I bury Hozelock irrigation pipes under the soil?
You can bury the 13mm supply pipe under 5cm of soil or mulch to hide it from view. It's best to keep the 4mm micro pipe and the drippers themselves on the surface to prevent soil from clogging the small outlets. This approach keeps your hozelock irrigation system discreet while ensuring you can easily check that every plant is being watered.
What is the maximum length for a Hozelock 13mm supply pipe?
The maximum recommended length for a Hozelock 13mm supply pipe is 50 metres in a single continuous line. If your run exceeds 50 metres, the water pressure drops and the plants at the end won't get enough water. For larger gardens, we recommend using a "T" connector to split the flow into two separate 25-metre branches.
Do I need a professional to install my Hozelock system?
You don't need a professional to install these systems as they're designed for simple DIY assembly. The Hozelock range uses a modular "Easy Drip" design that allows you to click components together in seconds. Most gardeners find they can set up a standard 20-pot watering kit in about 90 minutes with no tools other than a pair of kitchen scissors.
`-
Posted in
Hozelock