Drip Irrigation for Raised Beds: 2026 UK Design Guide
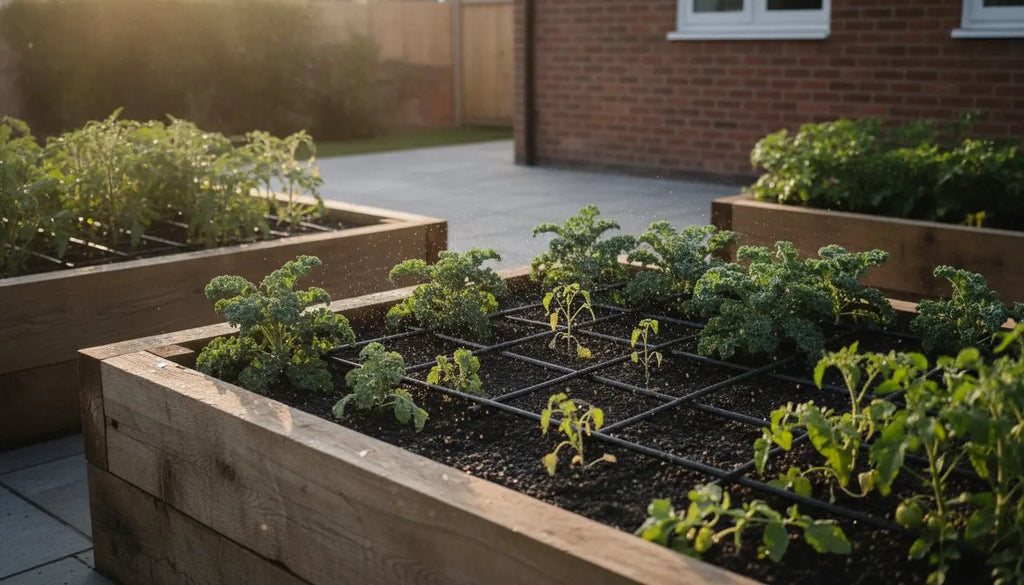
Did you know that a standard garden sprinkler can use up to 1,000 litres of water in just one hour? In a summer like 2026, with hosepipe bans affecting much of the UK, that level of waste is both costly and unsustainable. You have likely experienced the frustration of uneven watering, where some corners of your garden stay parched while others are waterlogged. It is easy to feel overwhelmed by the technical jargon of pipe sizes and connectors when you simply want your vegetables to thrive.
We understand that a precise drip irrigation layout for raised beds is the secret to a healthy and productive garden. By matching your system's geometry to the specific drainage patterns of raised soil, you can save up to 70% more water than using a traditional hosepipe. This guide will help you master the art of efficient design, ensuring your plants receive consistent hydration through a set-it-and-forget-it schedule. We will walk you through selecting the right components and planning a layout that reduces your water bills and guarantees a successful growing season.
Key Takeaways
- Learn how to design a professional drip irrigation layout for raised beds to ensure every plant receives consistent moisture without wasting a drop.
- Understand the critical role of pressure regulators and correct pipe sizing in preventing system leaks and maintaining uniform water pressure.
- Compare layout styles like parallel grids and perimeter loops to determine the most effective pattern for your specific crops and bed shapes.
- Follow a clear, step-by-step installation guide to set up a reliable tap assembly using expert-recommended components.
- Master the use of automatic water timers to create a resilient, set-it-and-forget-it system that protects your garden during UK heatwaves.
Why Your Raised Bed Needs a Strategic Drip Irrigation Layout
A drip irrigation layout for raised beds is more than just a series of pipes; it's a deliberate, geometric arrangement of tubing designed to provide uniform root-zone hydration. In a raised environment, soil is contained within a structure that increases air exposure on all sides. While this provides the excellent drainage that vegetables love, it also means your beds dry out much faster than traditional in-ground plots. Without a plan, you'll find yourself constantly battling dry spots and wilting leaves.
A well-designed system harnesses capillary action, which is the ability of water to move through the soil's tiny pores. Instead of just wetting the surface, a strategic layout allows for a "deep-soak" effect. This encourages roots to grow downward into the cooler, moister layers of the bed. Stronger root systems lead to healthier crops that can withstand the unpredictable UK weather. By delivering water slowly and steadily, you ensure the entire soil volume stays consistently hydrated.
The Problem with Manual Watering in Raised Beds
Many gardeners rely on a hand-held hose, but this often leads to surface runoff. When water is delivered too quickly, the top layer of soil becomes saturated and the excess simply flows over the edges before it can reach the roots. High-pressure sprays from a standard nozzle also cause soil compaction. This crushes the air pockets in your compost, making it harder for your plants to "breathe" and absorb nutrients. Inconsistent moisture levels are a primary cause of fruit splitting in tomatoes or "bolting" in lettuce, where the plant prematurely goes to seed due to stress.
Efficiency Gains with a Planned Layout
Focusing your water delivery exactly where it's needed is the most effective way to manage a garden. By using a dedicated drip irrigation layout for raised beds, you avoid watering the gaps between plants. This doesn't just save water; it actively discourages weed growth in unplanted areas. Automation also allows you to water during the "golden hours" of dawn and dusk when evaporation rates are at their lowest. Drip irrigation efficiency is defined as the ratio of water absorbed by roots to the total volume of water delivered.
Core Components: Designing Your Raised Bed Watering System
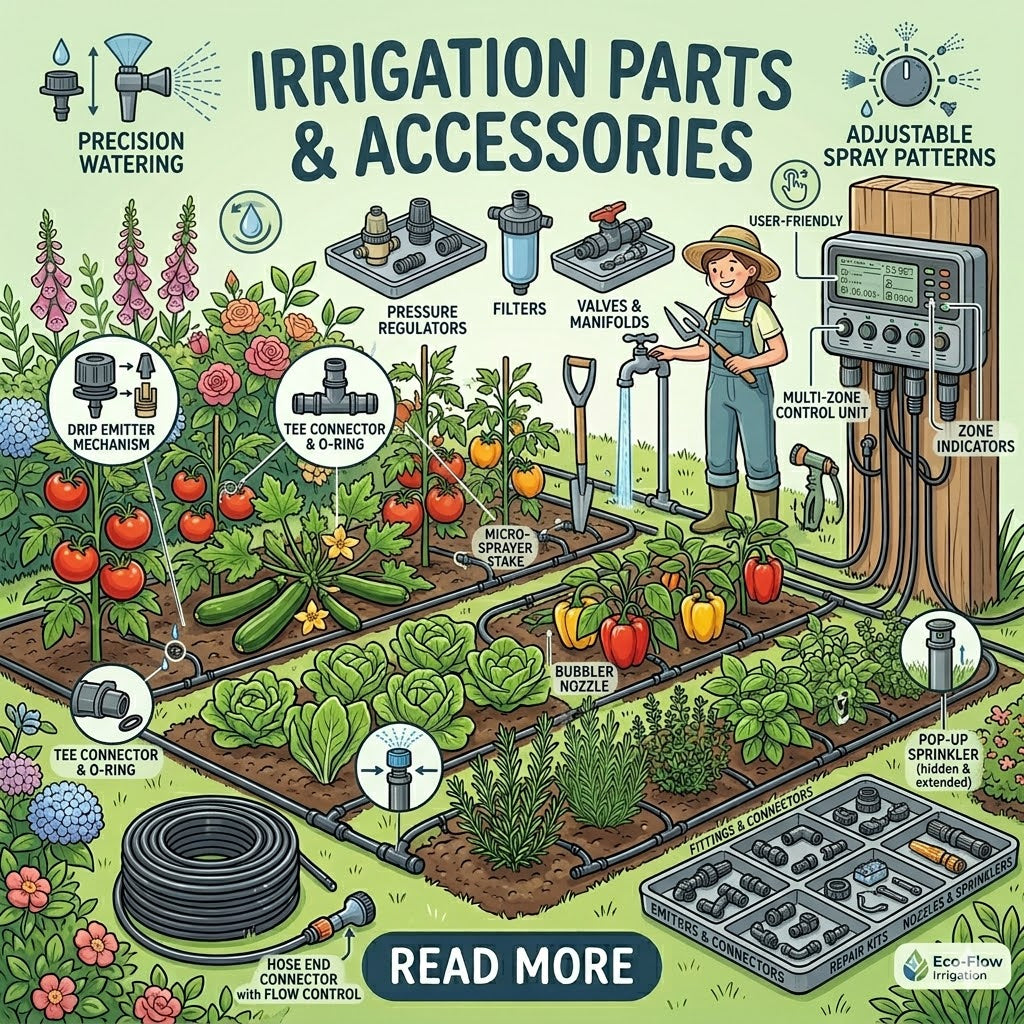
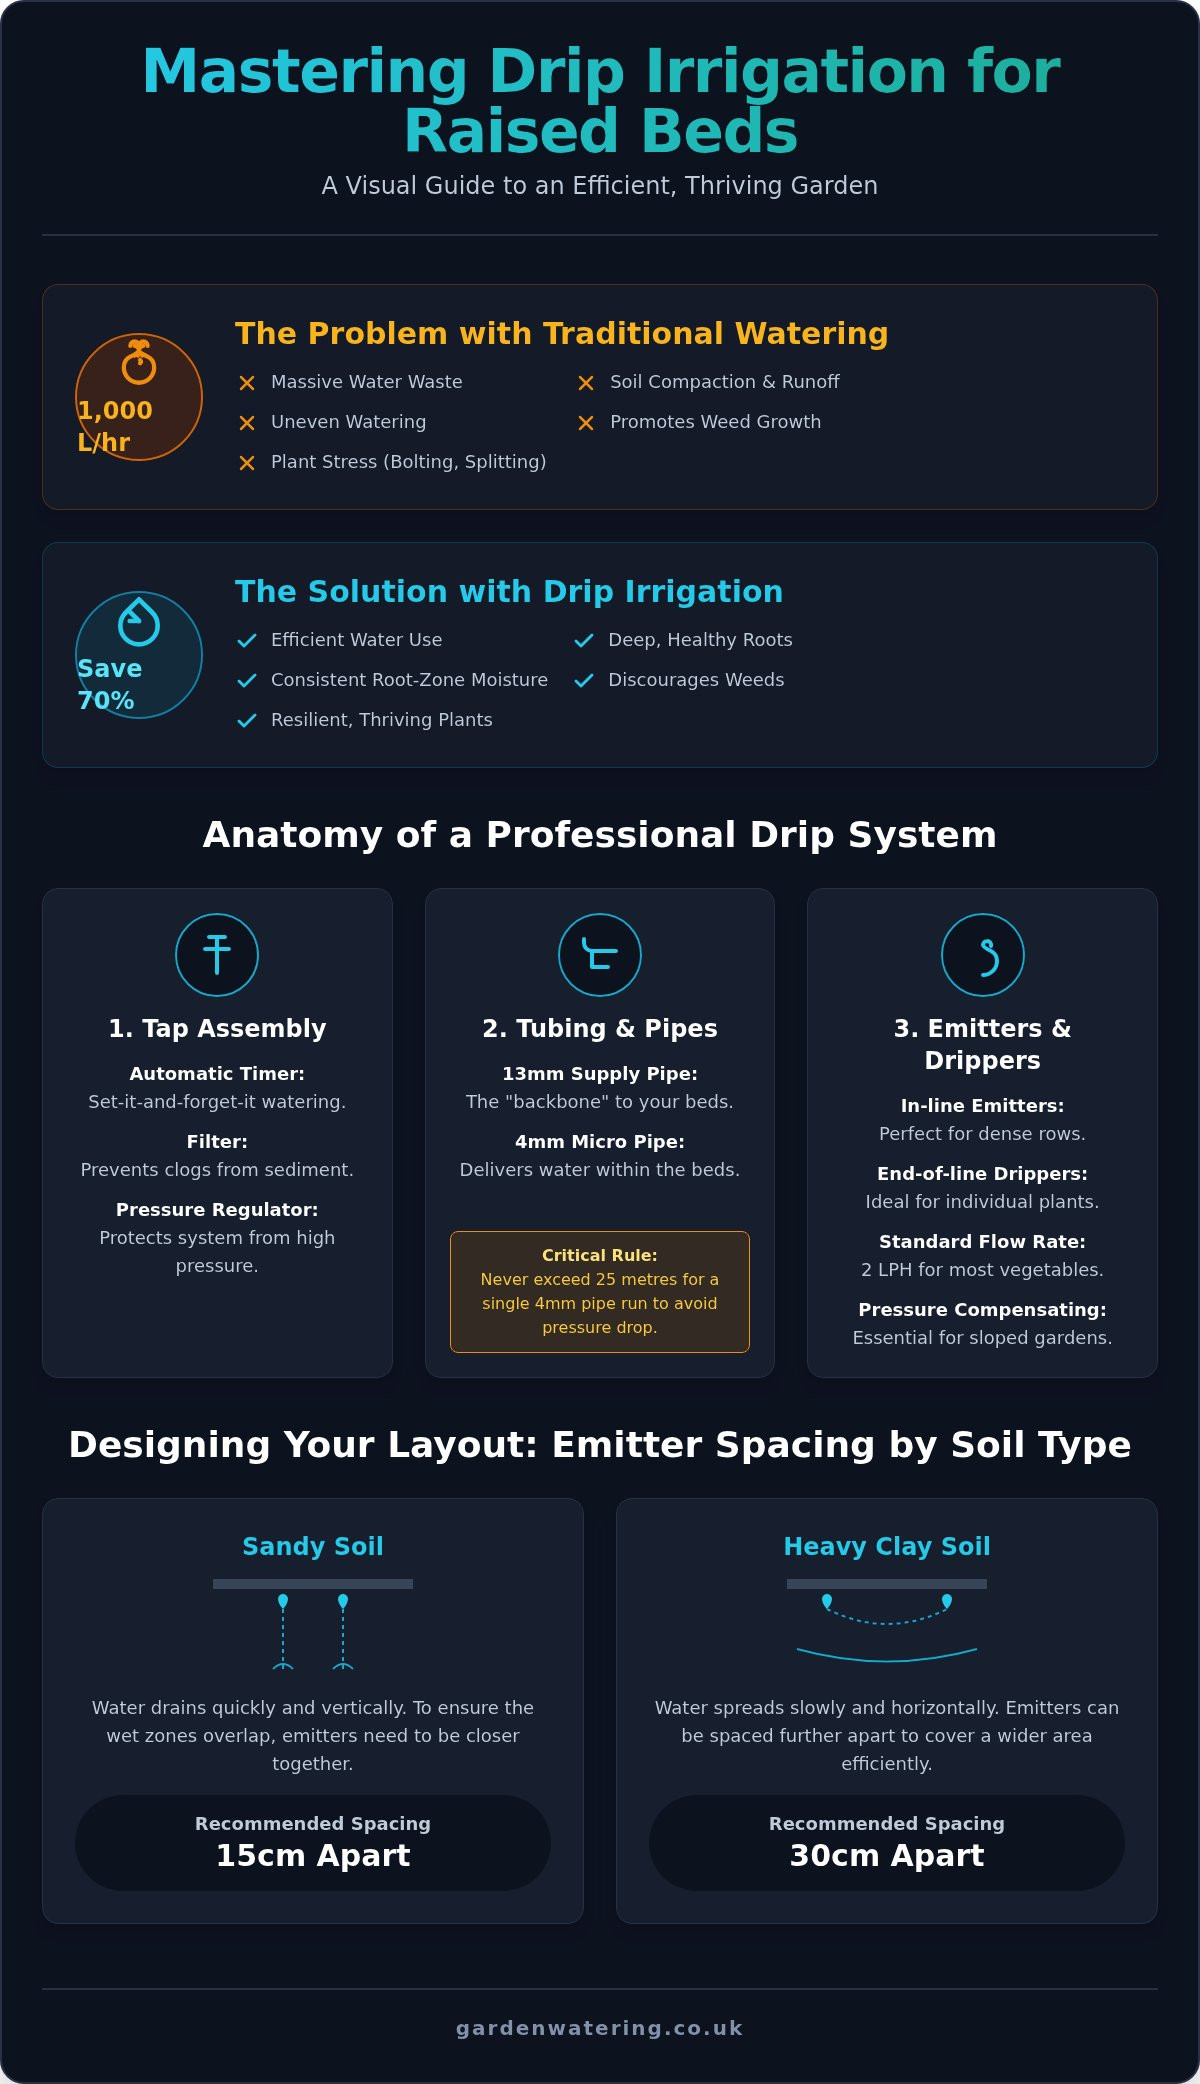
Building a professional drip irrigation layout for raised beds requires a collection of specialised parts that work in harmony. You can't simply run a hose and hope for the best. To achieve a set-it-and-forget-it system, you must start at the tap with a pressure regulator and a filter. UK mains pressure is often too high for delicate micro-fittings. A regulator brings this down to a manageable level, preventing your connectors from blowing off mid-cycle. Similarly, a filter is essential in many parts of Britain where hard water is prevalent. It catches limescale and sediment before they can clog your emitters, ensuring your system remains maintenance-free for years.
The choice between in-line emitters and end-of-line drippers depends on your planting style. In-line emitters are built directly into the pipe at fixed intervals, making them perfect for densely planted rows. If you have individual specimen plants or large pots within your beds, end-of-line drippers allow you to place water exactly at the base of each stem. For a deeper technical dive into these mechanics, this Do-It-Yourself Guide to Backyard Drip Irrigation provides excellent data on flow rate calculations.
Supply Pipes vs. Drip Lines
Think of your 13mm supply pipe as the "header" or backbone of your garden. It carries the bulk of the water from your tap to the edge of your raised beds. Once you reach the bed, you transition to 4mm micro-pipe or drip lines. It's vital to follow the 25-metre rule. Never run a single length of 4mm pipe longer than 25 metres. If you exceed this, the friction inside the small pipe causes the water pressure to drop, leaving the plants at the end of the line thirsty. For larger gardens, many specialists recommend using Hozelock Automatic Watering Systems to simplify the connection process between these different pipe sizes.
Emitter Spacing and Flow Rates
Your soil type dictates your emitter spacing. In sandy soil, water moves vertically very quickly. You'll need emitters spaced every 15cm to ensure the wet zones overlap. In heavy UK clay, water spreads horizontally, so 30cm spacing is usually sufficient. Most emitters are rated by Litres Per Hour (LPH). A standard 2LPH emitter is the workhorse of most vegetable gardens. If your allotment or garden is on a slope, always opt for pressure-compensating emitters. These clever devices ensure that the plant at the top of the hill gets the exact same amount of water as the one at the bottom.
If you're ready to start your project, exploring a range of Hozelock watering kits is a great way to ensure you have all the compatible connectors and regulators in one package.
Comparing Layout Styles: Grids, Loops, and Lines
Choosing the right drip irrigation layout for raised beds depends entirely on what you intend to grow. A layout that works for a dense patch of carrots will likely fail a large bed filled with perennial shrubs. By matching the geometry of your pipework to your planting plan, you ensure that water reaches every root zone without creating wasteful puddles or dry pockets. This strategic approach is what separates a thriving garden from one that struggles with inconsistent growth.
The Grid Layout for Intensive Planting
For beds dedicated to intensive vegetable rows like onions, carrots, or spinach, the parallel grid is the most effective choice. In this design, you run several parallel lines of drip pipe across the bed, typically spaced 30cm apart. To maintain equalised water pressure across the entire surface, use T-connectors to join these lines at both ends, creating a closed-loop system. This prevents the pressure drop often seen in single-ended lines. A grid layout ensures no "dry shadows" in the soil profile, providing a uniform curtain of moisture that supports every seedling in the row.
The Perimeter Loop for Mixed Beds
If your raised bed contains a mix of central shrubs and smaller plants around the edges, a perimeter loop is often more practical. Instead of covering the whole surface, you run the main line around the inner edge of the bed. This supports edge-dwelling plants while allowing you to branch off with micro-pipe to reach specific high-water-need plants in the centre, such as tomatoes or courgettes. You can find all the necessary components for this setup in our collection of Drip Irrigation Systems.
The snaking S-curve offers a flexible alternative for beds with irregular spacing. You weave a single length of drip line back and forth between your plants, making it easy to navigate around established root balls or decorative stones. However, for those managing multiple raised beds, the "Header and Lateral" design is the professional standard. This involves running a 13mm supply pipe (the header) along the path between your beds, with smaller lateral lines branching off into each individual bed. This modular approach makes it easy to isolate or adjust specific beds without affecting the rest of your garden's watering schedule.
Step-by-Step: Setting Up Your Drip Irrigation Layout
Success begins with a clear plan. Before you purchase any components, take a tape measure to your garden and record the exact dimensions of each bed. Sketching your drip irrigation layout for raised beds on paper allows you to count the precise number of T-pieces, elbows, and drippers required. This simple preparation prevents mid-project trips to the shop and ensures you don't end up with a surplus of unnecessary fittings.
Your installation should always start at the engine room: the outside tap. Assemble your components in this specific order: the tap, a double-check valve, your water timer, the pressure regulator, and finally the hose connector. Once the tap assembly is secure, lay your 13mm supply pipe along the paths or bed edges. Use plastic stakes to hold the pipe in place, ensuring it remains straight and tidy. After the mainline is positioned, use a hole punch tool to create entry points for your 4mm micro-pipes. Connect these smaller lines according to your chosen geometry, whether that is a grid or a perimeter loop.
One often overlooked step is flushing the system. Before you add the final end-caps or plugs, turn the water on for one full minute. This clears out any plastic shavings or soil that entered the pipes during construction. If left inside, these small bits of debris will quickly clog your emitters. Once the water runs clear, you can safely seal the ends and begin your watering schedule.
Connecting to the Outside Tap
To ensure a leak-free start, use a high-quality Hozelock connector. In the UK, water regulations require the use of a double-check valve on outside taps to prevent backflow into the mains supply. This is a vital safety feature for any permanent irrigation setup. For a professional finish, you can hide your supply pipes under a layer of gravel or bark mulch. This doesn't just look better; it also protects the plastic from UV degradation over time.
Connecting Multiple Raised Beds
Navigating 90-degree corners around your beds is easy with the right 'Elbow' and 'T' joiners. If you practice crop rotation, consider installing individual shut-off valves for each bed. This allows you to turn off the water to beds that are currently fallow or containing drought-tolerant crops. To balance the flow, try to keep your lateral runs of equal length. This ensures the last bed in the sequence receives as much water as the first, maintaining consistent pressure across your entire drip irrigation layout for raised beds.
If you're unsure which fittings you need for your specific garden shape, you can find everything required in our range of reliable Hozelock connectors.
Optimising for Success: Automation and Maintenance
A successful drip irrigation layout for raised beds isn't just about the physical pipes; it's about the intelligence behind the watering schedule. A Water Timer acts as the heart of your system, ensuring your plants receive hydration exactly when they need it most. With the hotter and drier conditions seen across the UK in 2026, automation has become essential for maintaining a thriving vegetable garden while adhering to national water reduction targets. Most drip systems are exempt from hosepipe bans if they are fitted with a timer and pressure-reducing valve, making this a resilient choice for the modern gardener.
Routine maintenance keeps your investment performing at its peak. Walk along your beds once a month to check for clogged emitters, especially in hard-water areas where limescale can build up. You should also look for pipe punctures caused by garden tools or curious wildlife. Catching a small leak early prevents water waste and protects your soil from the erosion issues discussed in earlier sections. If you notice a drop in pressure, check your filter first, as this is usually where sediment collects.
Programming Your Water Timer
Winterising Your Layout
Protecting your system from frost is the most important part of long-term maintenance. When water freezes, it expands, which can easily split your supply pipes and damage the delicate internal valves of your timer. Before the first frost hits, turn off your outside tap and drain the lines completely. Store your timers and pressure regulators indoors in a dry, frost-free place. This is also the perfect time to inspect 'O-rings' and washers for wear. Replacing these small, inexpensive parts in the autumn ensures a leak-free start for your drip irrigation layout for raised beds when the spring growing season arrives.
Ready to Transform Your Raised Bed Irrigation?
Designing an efficient drip irrigation layout for raised beds is the most effective way to ensure your crops thrive during the hotter UK summers. By selecting the right geometric pattern for your planting style and integrating a reliable water timer, you create a system that delivers deep hydration exactly where it's needed. This doesn't just save water; it builds a more resilient garden that can withstand the drainage challenges unique to raised structures. You've learned how to choose components, plan your geometry, and maintain the system for long-term success.
As a UK specialist with over 15 years of irrigation experience, we are dedicated to helping you achieve professional results. We provide the expert support you need to build a bespoke system using genuine Hozelock components that are built to last. Our team understands the specific needs of British gardeners and the importance of meeting national water standards.
Explore our range of Hozelock Drip Irrigation Kits and take the first step toward a more productive vegetable garden today. Your plants will thank you for the consistent care, and you'll enjoy the peace of mind that comes with a dependable, automated watering schedule.
Frequently Asked Questions
How far apart should drip lines be in a raised bed?
Drip lines should typically be spaced 30cm apart to ensure full coverage across your raised bed. If you have particularly sandy soil where water drains vertically very quickly, reducing this spacing to 15cm helps the moisture zones overlap. For heavy clay soil, a 30cm gap is usually sufficient as the water spreads horizontally. This spacing ensures that your drip irrigation layout for raised beds provides a uniform curtain of moisture for all your crops.
Do I need a pump for a raised bed drip system?
You don't need a pump if you are connecting your system to a standard UK mains outside tap. The natural pressure from your home's water supply is more than enough to power dozens of emitters across multiple beds. In fact, you'll likely need a pressure regulator to lower the pressure and protect your fittings. Pumps are only necessary if you're running a system from a low-level water butt or a static tank without enough elevation.
Can I use a soaker hose instead of a drip line layout?
You can use a soaker hose, but it is significantly less efficient than a structured drip line layout. Soaker hoses often deliver more water at the start of the run than at the end, leading to uneven growth. They also lose more water to evaporation because they wet the entire surface rather than targeting the roots. A dedicated drip system with individual emitters provides much better control and reduces water waste in your vegetable garden.
How long should I run drip irrigation for raised beds?
Most raised beds require between 10 and 20 minutes of watering twice a day, ideally at dawn and dusk. The exact duration depends on the flow rate of your emitters and the current UK weather conditions. During a heatwave, you might need to increase this frequency. It's best to check the soil moisture at root depth to ensure you aren't overwatering, as raised beds drain more quickly than in-ground plots.
How do I connect multiple raised beds to one tap?
To connect multiple beds, run a 13mm supply pipe from your tap along the path between the beds. Use T-connectors to branch off from this main header into each individual bed with 4mm micro-pipe. This modular approach allows you to maintain consistent pressure across your entire drip irrigation layout for raised beds. Installing individual shut-off valves for each bed gives you the flexibility to water only the areas currently in use.
What is the best drip irrigation kit for UK gardens?
Hozelock automatic watering kits are widely considered the reliable standard for UK gardens due to their compatibility with standard outside taps. These kits include all the essential components like pressure regulators, filters, and connectors needed for a successful DIY installation. Choosing a kit from an established specialist ensures you have access to replacement parts and expert advice. They are designed specifically to handle the water pressure and fitting types common in British households.
Do drip emitters get clogged with hard water?
Drip emitters can become clogged with limescale in areas with hard water, which is common across much of the UK. To prevent this, always include a high-quality filter at the start of your tap assembly. This catches sediment and mineral deposits before they reach the small openings in your drippers. If an emitter does clog, you can usually soak it in a mild descaling solution or vinegar to restore the water flow.
Can I bury drip irrigation pipes under the soil in a raised bed?
You can bury drip pipes, but it's usually better to place them on the soil surface and cover them with a thick layer of mulch. This protects the pipes from UV damage and keeps them out of the way of your garden tools. If you bury them too deeply, roots can sometimes grow into the emitters and cause blockages. Keeping them just below a mulch layer makes maintenance and seasonal adjustments much easier to manage.
`-
Posted in
Automatic Watering Systems, DIY Gardening, Drip Irrigation, drip irrigation layout for raised beds, Garden Design, Hosepipe Ban, Raised Beds, UK Gardening, Water Conservation