
Lawn Sprinkler System Layout Guide: Planning Your Perfect UK Garden Irrigation
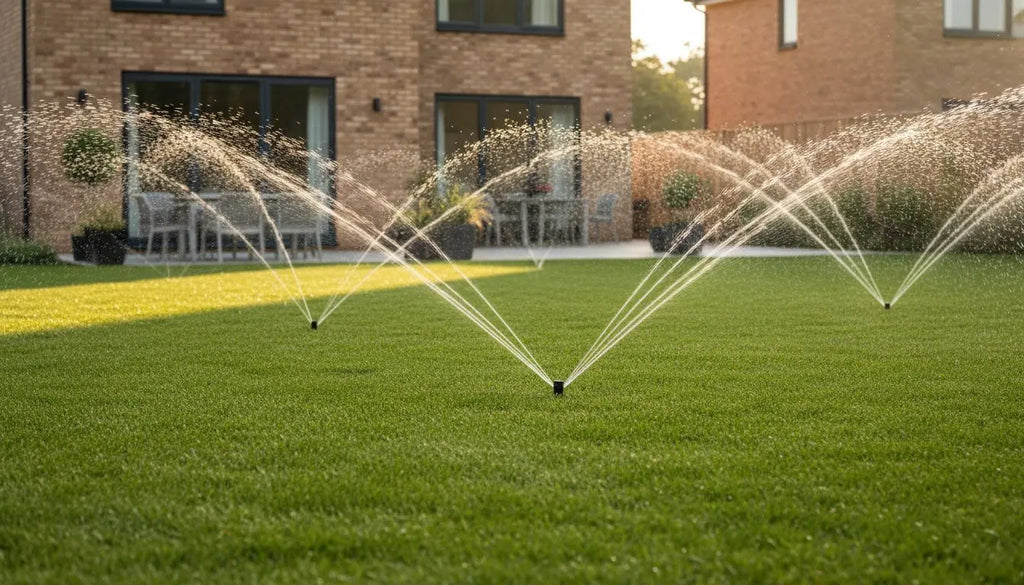
Why does your lawn still have stubborn brown patches even though you've spent hours with a hose or a basic oscillating sprinkler? You aren't alone; many UK homeowners struggle with uneven coverage because residential water pressure often limits how many heads can run simultaneously. It's frustrating to invest time and money into your garden only to see it look parched during a dry spell. We understand exactly what your grass needs to thrive, and we're here to help you move beyond guesswork.
This lawn sprinkler system layout guide will show you how to master the art of head-to-head coverage and pressure-balanced zoning to design a professional-grade irrigation system. By following our specialist advice, you'll gain the confidence to select the right Hozelock components for your specific garden dimensions. We'll walk you through creating a clear, scalable plan that eliminates dry spots and ensures a lush, green finish with zero manual effort. You'll learn how to group your sprinklers into efficient zones that work perfectly with your local water pressure, turning a complex project into a straightforward success.
Key Takeaways
- Learn how to achieve professional head-to-head coverage to ensure every inch of your grass receives uniform hydration for a lush, healthy lawn.
- Use our lawn sprinkler system layout guide to accurately calculate your "water budget" using a simple 10-litre bucket test at your outside tap.
- Discover how to map your garden to a 1:100 scale, allowing you to plan efficient pipe routing while avoiding obstacles like patios and sheds.
- Master the art of pressure-balanced zoning by grouping Hozelock pop-up sprinklers with similar precipitation rates for maximum water efficiency.
- Find out how to integrate Hozelock automatic controllers to manage your custom irrigation layout with minimal effort and expert precision.
Understanding the Fundamentals of a Lawn Sprinkler Layout
Creating a lawn sprinkler system layout guide begins with viewing your garden as a grid of specific needs. It's more than just placing heads where they look right; it's a strategic map designed to ensure every blade of grass receives the exact amount of moisture required to thrive. Understanding irrigation sprinklers and their spray patterns is the first step in recognising how these mechanical heads distribute water across your turf. A professional layout ensures that your investment in hardware translates into a lush, green landscape rather than a patchy lawn with water-logged corners.
To better understand this concept, watch this helpful video:
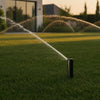
The most critical rule in any design is head-to-head coverage. You might think that having one sprinkler reach the edge of another's spray circle is sufficient. It isn't. Most sprinklers apply less water close to the head and more at the outer edge of their reach. By "throwing" water from one head all the way to the base of the next, you create a uniform curtain of moisture. This overlap is non-negotiable if you want to avoid the brown, dry spots that often plague poorly planned DIY systems. It ensures that every square inch of your lawn gets the same depth of water, regardless of its distance from a nozzle.
UK weather also plays a significant role in your design. Wind can easily carry fine mist away from your target area, while midday sun leads to rapid evaporation. A well-planned layout accounts for these variables by using larger droplets or positioning heads to compensate for prevailing breezes. By understanding these environmental factors, you can time your watering and position your equipment to maximise every drop.
Why a Good Layout Saves Water and Money
Efficiency is the primary goal of a professional layout. Precise planning prevents "overlap waste," where certain areas become boggy while others stay parched. Over-saturation doesn't just waste a precious resource; it can lead to root rot and fungal diseases in your grass. Beyond the lawn, a smart design ensures you aren't spraying your wooden fences or garden sheds. Constant dampness can lead to timber rot, which may cost hundreds of pounds to repair or replace. A strategic map also reduces the load on your pump or mains supply by grouping heads into efficient, high-performance zones.
Essential Tools for Your Planning Phase
Don't start your project without the right kit. You'll need graph paper, a 30-metre measuring tape, and a compass to map out your garden's boundaries and obstacles. Using a garden watering system framework helps you visualise the final result before you buy a single pipe. Most importantly, use a water pressure gauge at your outside tap. Knowing if your supply provides 2.0 bar or 4.0 bar of pressure determines exactly how many heads you can run simultaneously. Without this data, your lawn sprinkler system layout guide remains guesswork rather than a reliable plan.
Step 1: Measuring Your UK Water Pressure and Flow Rate
Before you start sketching out your garden, you must understand your "Water Budget." This figure determines how many sprinkler heads you can run simultaneously. If you try to power six sprinklers on a budget meant for three, none of them will work correctly. A successful lawn sprinkler system layout guide relies on accurate data from your outside tap rather than guesswork. Your layout is entirely dependent on this capacity; it dictates how many zones you need to create to ensure every blade of grass receives adequate moisture.
The Bucket Test: A Step-by-Step Guide
The simplest way to measure flow rate is with a standard 10-litre bucket and a stopwatch. This test provides the Litres Per Minute (LPM) figure essential for your design. Follow these steps for an accurate reading:
- Ensure all other taps, showers, and appliances in the house are turned off.
- Turn your outside tap on to its maximum setting.
- Time exactly how many seconds it takes to fill the 10-litre bucket to the brim.
- Use this formula: (60 / seconds to fill) x 10 = LPM.
If your bucket fills in 40 seconds, your flow rate is 15 LPM. It's a good idea to repeat this test at different times of the day. Water demand in your local UK area often peaks between 7:00 AM and 9:00 AM. Testing during these windows gives you a realistic "worst-case" figure to ensure your system remains reliable when the neighbourhood is busy. Following an expert lawn watering guide helps ensure you aren't just wetting the surface but providing enough volume for deep root penetration.
Working with UK Pressure Constraints
Pressure is measured in Bar. You need to distinguish between "Static" pressure (when water is still) and "Working" pressure (when water is flowing). While static pressure might look high on a gauge, the friction of water moving through pipes causes it to drop. Most high-quality pop-up sprinklers require at least 2.0 Bar of working pressure to rotate and spray effectively. If your pressure is consistently below this mark, your lawn sprinkler system layout guide will likely need to include smaller zones or a pump for watering to boost performance.
Pipe diameter also plays a massive role in performance. A 19mm supply pipe allows for significantly more volume and less pressure loss than a standard 13mm garden hose. This small upgrade can often be the difference between a patchy lawn and a lush, healthy garden. If you find your flow is lower than expected, you can browse our professional connectors to find high-flow options that minimise restrictions at the tap.
Step 2: Mapping Your Lawn and Sprinkler Placement
Designing an effective irrigation system starts with a precise map. Grab some graph paper and draw your garden to a scale of 1:100 (where 1cm equals 1m) or 1:50 (where 2cm equals 1m) for smaller UK plots. This drawing serves as your primary lawn sprinkler system layout guide, helping you avoid costly mistakes before you even pick up a spade. A scaled drawing allows you to measure the exact "radius of throw" for each sprinkler head, ensuring you don't leave dry patches in the middle of your turf.
Mark every "Obstacle Zone" clearly on your plan. These include patios, garden sheds, greenhouses, and established flower beds that shouldn't be hit by high-pressure sprays. You also need to pinpoint the exact location of your outside tap and any available power sources for your irrigation controller. Knowing where your water starts helps you plan the most efficient pipe routes.
When planning the layout, you'll generally choose between two patterns:
- Square Spacing: This is the simplest method for rectangular or square lawns. It's easy to map and ensures consistent coverage across the main body of the grass.
- Triangular Spacing: This pattern is often better for irregular or curved garden shapes. It provides superior coverage in overlapping areas and is generally more wind-resistant, which is a vital consideration for exposed UK gardens.
The Golden Rule: Head-to-Head Coverage
The most common mistake in DIY irrigation is placing heads too far apart. To keep your grass lush, you must achieve "head-to-head" coverage. This means the spray from one sprinkler must reach the base of the next one. This creates a 50% overlap, which is the industry standard for professional lawns. It might seem like overkill, but the area closest to a sprinkler head receives the least amount of water. Overlapping ensures every blade of grass gets the same 15mm to 25mm of water it needs each week to thrive.
Positioning Perimeter and Corner Heads
Always begin your layout at the corners of your lawn. Start by placing 90-degree arc sprinklers in every corner to protect your fences and house from water damage. Next, place 180-degree perimeter heads along the straight edges between those corners. If your lawn is wider than the maximum reach of your chosen sprinklers, you'll need to add 360-degree full-circle heads in the centre to fill the gaps. Following this methodical lawn sprinkler system layout guide ensures you cover every square metre of turf while keeping your paths and patios dry. This approach maximises efficiency and prevents water waste, making your system more environmentally friendly.

Step 3: Creating Zones and Pipe Routing
Most UK homes have a water flow rate between 15 and 25 litres per minute (LPM). This volume usually isn't enough to power a full garden system simultaneously. You must divide your plan into "zones." Each zone is a specific group of sprinklers that run at the same time. By splitting the load, you ensure every head receives the pressure it needs to operate effectively.
When following your lawn sprinkler system layout guide, you must group heads with similar precipitation rates. Rotating sprinklers deliver water much slower than fixed spray heads. If you put them in the same zone, one area will be flooded while the other stays dry. You should never mix pop-up sprinklers and drip lines in a single zone. Drip systems often run for 45 minutes to soak the soil, whereas pop-ups might only need 12 minutes. Mixing them leads to wasted water and patchy grass.
Calculating Your Zone Capacity
To find your capacity, add the LPM requirement of every head in a proposed zone. We recommend keeping the total demand 10% to 20% below your measured LPM. This buffer accounts for natural fluctuations in UK mains pressure during peak evening times. You can manage these distinct areas effortlessly using a hozelock water timer. These devices schedule each zone to run sequentially, ensuring your garden stays lush without overtaxing your supply.
Pipe Sizing and Friction Loss
Pipe diameter significantly impacts performance. We suggest using 19mm or 25mm main lines for most UK gardens. Smaller 13mm pipes cause too much friction, which drops the pressure before water reaches the head. Planning your pipe routes is a critical stage of any lawn sprinkler system layout guide, as it determines how much energy actually reaches your grass. Keep your runs as straight as possible to avoid pressure drops.
A "Loop" layout is often superior to a "Branch" layout for larger lawns. By connecting the end of the pipe back to the start, you balance the pressure across all heads. This ensures the last sprinkler in the line performs just as well as the first. When mapping your trench path, follow the perimeter of the lawn where possible. This minimizes disruption to your turf and makes it easier to locate pipes for future maintenance. Aim for a trench depth of 200mm to 250mm to protect the pipes from garden aerators and sharp spades.
Bringing the Plan to Life with Hozelock Components
Once your paper design is complete, it is time to select the hardware that turns your lawn sprinkler system layout guide into a functional reality. We specialise exclusively in Hozelock equipment because it offers the reliability UK gardeners need to ensure their turf remains lush throughout the summer. Choosing between Hozelock Pro and Standard pop-up models depends on your garden size and usage. The Pro range features more robust internal components designed for higher pressure environments, whereas the Standard models provide an excellent, cost-effective solution for traditional residential lawns.
Efficiency is the cornerstone of any modern garden. Integrating a hozelock automatic watering system controller is the best way to manage your water consumption. These timers allow you to schedule irrigation for the early morning, which can reduce water loss from evaporation by up to 50 percent compared to midday watering. For the setup phase, we always recommend using Hozelock "easy-click" connectors. These fittings allow you to snap components together or swap them out instantly, making the trial-and-error phase of your installation much simpler.
Selecting Your Sprinkler Heads
Matching the radius of throw to your lawn segments is vital for head-to-head coverage. If your lawn is 8 metres wide, don't choose a sprinkler with only a 4-metre reach unless you plan to install multiple rows. For awkward garden shapes or curved borders, use adjustable arc nozzles. These allow you to fine-tune the spray from 0 to 360 degrees, ensuring you water the grass rather than your garden fence. If you are managing a smaller urban plot, exploring hozelock watering kits can save you time, as they include pre-selected components tailored for compact spaces.
Testing Your Layout Above Ground
We've helped thousands of customers over our 15 years of experience, and the best advice we can give is to test before you dig. Assemble your entire system on the lawn surface using your lawn sprinkler system layout guide as a map. This allows you to check for "dry spots" using a "Catch Can" test. Place several identical shallow containers across the lawn and run the system for 10 minutes. If one container is significantly emptier than the others, you need to adjust your nozzle angles or spacing. This simple step ensures perfect perimeter alignment before any soil is moved.
Final Checklist Before Digging:
- Verify your water pressure (Bar) matches the requirements of your total number of heads.
- Ensure all "easy-click" seals are seated correctly to prevent leaks.
- Check that spray patterns do not overlap onto house windows or wooden decking.
- Confirm you have enough supply pipe to reach the furthest corner of your garden.
Get Started on Your Perfect Lawn Today
Designing a lush, green space doesn't happen by accident. It starts with precise water pressure readings and a strategic map that eliminates dry patches. Following this lawn sprinkler system layout guide gives you the framework needed to achieve professional results at home. By dividing your garden into manageable zones and selecting the right pipe routing, you'll save water and keep your plants thriving throughout the British summer.
We've spent over 15 years refining our UK irrigation expertise to help gardeners like you. As exclusive Hozelock specialists, we understand how these specific components work together to provide even coverage across every square metre of your turf. If you're feeling unsure about your design, take advantage of our free expert advice on system design to ensure your plan is perfect before you start digging.
Browse our full range of Hozelock Pop-Up Sprinklers and Kits
Your dream garden is well within reach, and we're here to help you every step of the way.
Frequently Asked Questions
How many sprinkler heads can I run off one UK outside tap?
Typically, you can run 1 to 3 pop-up heads from a single UK outside tap. Most domestic taps deliver between 15 and 22 litres of water per minute. It's vital to perform a bucket test before you start. Simply time how long it takes to fill a 10-litre bucket; if it takes 30 seconds, your flow rate is 20 litres per minute.
What is the best pipe size for a residential lawn sprinkler system?
A 25mm MDPE pipe is the most effective choice for a residential garden. This diameter provides the perfect balance between water volume and pressure, which is a core principle in any lawn sprinkler system layout guide. While 20mm pipe is cheaper, it often causes pressure drops over distances exceeding 25 metres. Stick to 25mm for a dependable, high-quality result.
Do I need a professional to design my sprinkler layout?
You don't need a professional if you follow a structured lawn sprinkler system layout guide and use quality components. We specialise exclusively in providing the expert advice you need to build your own system. DIY installation can save you over £800 in labour costs. Our goal is to give you the confidence to create a professional-standard irrigation solution yourself. For those who prefer a turnkey solution, professional firms like EcoShine Kft. provide comprehensive garden construction services that handle everything from planning to final implementation.
Can I mix different brands of sprinkler heads in one layout?
You can mix brands like Hozelock and Claber, but you shouldn't mix different types of heads on the same zone. For example, don't put a high-flow impact sprinkler on the same pipe as a low-flow gear-driven pop-up. This ensures even water distribution across your lawn. Stick to one brand per zone to keep maintenance simple and ensure all parts are compatible.
How deep should I bury the pipes for my lawn irrigation?
Bury your pipes at a depth of 200mm to 250mm to ensure they're safe from garden tools. This depth protects the system from lawn aerators which typically penetrate 100mm into the soil. It's deep enough to avoid accidental damage but shallow enough to reach if you ever need to make a repair. Remember to install a drain valve at the lowest point.
What happens if my water pressure is too low for pop-up sprinklers?
If your pressure is below 1.5 bar, you should split your garden into multiple smaller zones controlled by a water timer. This directs the full pressure of your tap to just one or two heads at a time. Alternatively, installing a dedicated booster pump can increase pressure by up to 3 bar. This ensures your pop-up heads retract and extend correctly every time.
How do I avoid watering my patio or house walls?
Install sprinklers with adjustable arcs to ensure water stays exactly where it's needed. By positioning heads at the corners of your lawn and setting them to a 90-degree spray pattern, you avoid soaking your house walls or patio. Modern nozzles allow for precision adjustment. This ensures every drop helps your garden thrive rather than wasting water on hard surfaces like stone or brick.
Is a lawn sprinkler system worth it for a small UK garden?
A sprinkler system is definitely worth it for small UK gardens as it provides the consistent hydration needed for healthy turf. Even in a 40 square metre garden, an automated system saves you roughly 3 hours of watering time every week during summer. It's an efficient solution that ensures your lawn remains lush and healthy even when you're away from home or busy.
`-
Posted in
lawn sprinkler system layout guide