
Claber Colibri Pop-Up Kit: The Perfect Lawn Pop-Up Kit
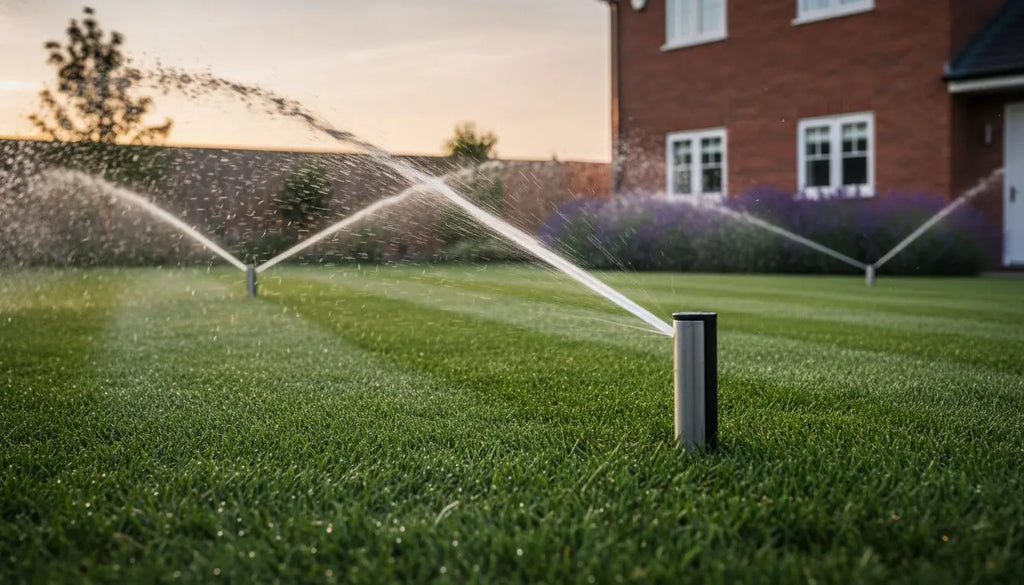
A lush, green lawn is the centrepiece of many British gardens, but keeping it perfectly watered can be a constant chore. Dragging out the hosepipe every evening, especially during dry spells or potential hosepipe bans, is time-consuming and often leads to uneven results. A Claber pop-up sprinkler system offers the perfect solution: a discreet, automated, and highly efficient way to achieve a professional-grade lawn with minimal effort. This guide provides expert advice on how to design, install, and maintain the ideal system for your UK garden.
Table of Contents
What is a Claber Pop Up Sprinkler System?
-
Discreet by Design: The core components are hidden underground, preserving your lawn's aesthetics and allowing for easy mowing.
-
Why Claber? Claber’s engineering is specifically tailored for British gardens, accounting for typical UK lawn sizes, shapes, and water pressure standards, ensuring reliability and performance.
-
Total Automation: When paired with a Claber water timer, the entire process becomes a "set-and-forget" task, watering your lawn at the most optimal times, day or night.
The Anatomy of an Underground System
Understanding the components is the first step to appreciating the system's elegant simplicity. It consists of three main parts: a water timer connected to your tap, a network of underground supply pipes, and the pop-up sprinkler heads themselves. This "invisible" watering method is the gold standard in modern landscaping, delivering water precisely where it's needed without intruding on your garden's beauty. Unlike traditional sprinklers that you have to move around, a pop-up system is a permanent, efficient upgrade to your garden care routine. (sprinkler irrigation systems)
Why Claber Specialism Matters
As irrigation specialists with over 15 years of experience, we focus on Claber because we know their components are designed to work together seamlessly. This ensures long-term reliability and leak-free performance. Our passion for irrigation drives us to select and recommend systems that genuinely solve the challenges faced by UK homeowners. By choosing a cohesive system, you get the peace of mind that every part is compatible and built to last. For a deeper dive into the complete ecosystem, explore our complete 2026 UK expert guide to Hozelock auto watering systems.
Planning Your Lawn Irrigation Layout
Precision planning is the secret to a flawless pop-up sprinkler system. Rushing this stage can lead to dry patches or wasted water. Before you buy any components, take the time to map your lawn and understand your water supply. A well-designed layout guarantees every blade of grass receives the right amount of water.
-
Embrace the "Head-to-Head" Rule: This is the most crucial principle of professional irrigation. It means that the spray from every sprinkler head must reach the next sprinkler head. This overlap ensures there are no dry spots left between the spray patterns, resulting in uniform green coverage.
-
Sketch Your Lawn: Draw a simple, to-scale map of your lawn. Mark any obstacles like trees, paths, or flowerbeds, and note any curved edges. This visual plan will be your blueprint for placing sprinklers.
-
Calculate Your "Water Budget": Your system's size is dictated by your home's water flow rate. You can only run as many sprinklers as your outside tap can supply at one time.
-
Divide into "Zones": If your water pressure is insufficient to power all the required sprinklers simultaneously, you can divide your garden into smaller zones. Each zone runs on a separate schedule, ensuring every head operates at optimal pressure.
Measuring Flow Rate and Pressure
Before designing your system, you need to know what your tap can deliver. This is a simple but vital test. Use a 10-litre bucket and a stopwatch to time how long it takes to fill it from your outside tap, fully open. This gives you your flow rate in Litres Per Minute (LPM). While flow rate determines how many sprinklers you can run, pressure (measured in Bar) is what makes them "pop up" and spray effectively. Most UK homes provide between 1.5 and 3 bar of pressure, which is typically sufficient for Claber systems. (water-efficient irrigation practices)
Mapping Sprinkler Positions
Using your lawn sketch, start placing sprinklers. The best practice is to position heads in the corners first to ensure the perimeter is fully covered. From there, fill in along the edges and, if necessary, in the middle of the lawn, always adhering to the head-to-head rule. You can choose sprinkler heads with different spray arcs—such as 90° for corners, 180° for sides, and 360° for central areas to match your lawn's specific shape. For more detailed guidance on creating a professional plan, see our lawn sprinkler system layout guide.

Essential Claber Components for Your System
A Claber system is built from a few key, high-quality components designed to work in harmony. Understanding what each part does will help you build the perfect kit for your garden's needs.
-
Claber Colibri Pop-Up Sprinklers: These are the workhorses of the system. Claber offers a range of models with different spray distances and patterns to suit everything from small urban lawns to larger garden estates.
-
Supply Pipes: The underground network requires durable piping. We recommend either 25mm MDPE pipe or Claber’s specific large-diameter irrigation hose to ensure optimal water flow and pressure.
-
Connectors and Adaptors: These are the "glue" that holds your system together. Using high-quality, watertight Claber connectors is essential to prevent underground leaks.
-
Automatic Controllers: The brain of the operation. Timers range from simple dial-based models to the sophisticated Claber Duplo timer, which allows you to manage your watering system with the perfect options.
Selecting the Right Sprinkler Heads
Claber offers different ranges of pop-up sprinklers, including their Pro and Standard models, which vary in durability and spray distance. For quiet and reliable operation, look for models with "interference-free" gear drives, which provide a smooth, continuous rotation. Choosing the right head depends on the size and shape of the area it needs to cover. Pre-bundled kits can be a great starting point, but you can also build a custom system from individual components to perfectly match your lawn. (Maintaining and winterizing an irrigation system)
The Role of Water Timers
An automatic water timer transforms your system from a convenience into a true "set-and-forget" solution. Models like the Claber Video 2 are ideal for UK gardens, as they can be programmed to water at sunrise and sunset the best times to minimise evaporation. For ultimate efficiency, integrating a rain sensor is a smart move. It will automatically pause your watering schedule during wet British summers, saving water and preventing your lawn from becoming waterlogged. Explore our full range of garden irrigation water timers to find the perfect controller.
Step-by-Step Installation Guide
Installing a pop-up system is a manageable DIY project that can be completed over a weekend. The key is methodical work and preserving your lawn during the process.
-
Lay It Out First: Before digging, lay all the pipes and sprinkler heads out on the surface of the lawn. Connect them to the tap and run a test to check the spray coverage is correct. It's much easier to make adjustments now than after the trenches are dug.
-
Use the "V-Trench" Method: To lift your turf without killing it, use a spade to cut a V-shaped channel. You can then peel the turf back, dig the trench for the pipe, and lay the turf neatly back on top afterwards.
-
Connect the Pipework: Use high-quality Claber connectors to join the pipes. Ensure all connections are tight to create a secure, watertight seal that will last for years underground.
-
Backfill and Tamp: Once the pipes are laid, backfill the trench with soil and carefully replace the turf. Tamp it down firmly to ensure the ground is level. This prevents sprinkler heads from becoming a hazard for your lawnmower.
Trenching and Pipe Laying
Dig your trenches to a depth of around 15-20cm (6-8 inches). This is deep enough to protect the pipes from accidental damage from garden spades or aerators and provides insulation against frost. Before attaching the final sprinkler heads, it's crucial to flush the system with water to clear out any dirt or debris that may have entered the pipes during installation.
Connecting and Adjusting Sprinkler Heads
Use the correct adaptors to connect the sprinkler heads to the supply pipe for a secure, leak-proof seal. Once connected, you can fine-tune the system. Most Claber pop-ups allow you to adjust the spray arc (the pattern of rotation) and the distance (how far it throws water) using a special adjustment key. Turn the system on and check every junction for leaks and every head for correct operation before you begin backfilling.
Maintaining and Winterising Your System
A Claber pop-up system requires very little maintenance, but a few routine checks will ensure it performs perfectly for years. Proper winterisation is also essential to protect it from the harsh UK winters.
-
Clean Filters Regularly: UK water mains can sometimes carry small amounts of grit. Periodically cleaning the small filter in each sprinkler head will prevent nozzles from becoming clogged.
-
Check for "Sinking" Heads: Over time, heads can settle into the soil. Check them each spring to ensure they are still flush with the lawn surface to avoid being damaged by a mower.
-
Winterise Before the First Frost: The most important maintenance task is to drain the system of water before winter. This is known as the "blow-out" or drainage method and prevents frozen water from cracking pipes and fittings.
Routine Maintenance for Longevity
Winterisation: Protecting Against UK Frost
To protect your investment, you must drain the system before the first hard frost. Water expands by approximately 9% when it freezes, which can easily shatter plastic pipes and fittings underground. You can drain the system using a compressor to blow the water out or by installing automatic drain valves at low points. Finally, remove your water timer from the tap and store it indoors to protect the battery and any LCD screens from the cold.
Frequently Asked Questions
**Do I need a pump for a Claber’s pop-up sprinkler system?
**
Generally, no. Claber systems are designed to run off standard UK mains water pressure. A pump would only be necessary in rare cases of extremely low pressure or if you are using a non-pressurised water source like a rainwater tank.
**How many pop-up sprinklers can I run off one UK outside tap?
**
This depends entirely on your home's water flow rate (LPM). After performing the 10-litre bucket test, you can add up the LPM requirements of each sprinkler you plan to use. The total must not exceed your tap's output. If it does, you'll need to split your system into two or more zones.
**What is the best time of day to set my Claber timer for?
**
The best times are early morning (around 4-6 am) or late evening. Watering at these times minimises water loss through evaporation and allows the water to soak deep into the roots overnight.
**Can I install a pop-up system in an existing lawn without ruining it?
**
Yes, absolutely. By using the "V-trench" method described in our guide, you can carefully lift and replace the turf. The trench lines will be visible for a few weeks but will quickly heal and disappear, leaving no trace of the installation.
**What pipe size should I use for Claber pop-up sprinklers?
**
For the main supply line, a larger diameter pipe like 25mm MDPE or Claber’s equivalent is recommended to carry sufficient water volume and maintain pressure over distance.
**How do I stop my lawnmower from damaging the sprinkler heads?
**
Proper installation is key. Ensure the top of the sprinkler head is installed flush with the soil level, not protruding above it. When retracted, the mower blade should pass safely over the top.
**Why is my pop-up sprinkler not popping up fully?
**
This is almost always a pressure issue. It can be caused by running too many sprinklers at once for your flow rate, a leak in the system, or a blockage in the sprinkler's filter. Check for these issues first.
**How deep should I bury the irrigation pipes in a UK garden?
**
A depth of 15-20cm (6-8 inches) is ideal. This protects the pipe from garden tools and provides good insulation against frost.
`-
Posted in
Claber, DIY Irrigation, Garden Watering, Hozelock pop up sprinkler system, Lawn Care, Pop-Up Sprinklers, Sprinkler System, UK Gardening