Irrigation for Community Gardens: A Practical UK Guide
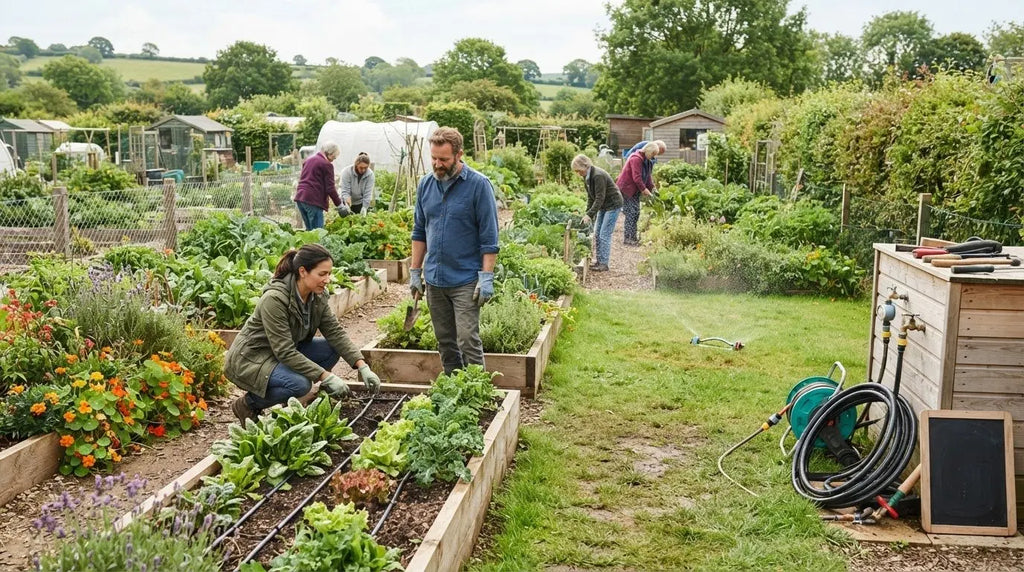
What if the answer to a dry community garden isn’t simply more watering, but a better match between each growing area and its watering method? Volunteer schedules can be unpredictable, and vegetable beds, containers, borders and lawns don’t all need water in the same way. Well-planned irrigation solutions for community garden projects can make watering more consistent while helping volunteers share the work clearly.
A dependable system starts with the garden itself. Drip irrigation can deliver water near plant roots in beds and growing areas, while micro-jets or sprinklers may suit areas that need wider coverage. A clear layout, agreed watering routine and compatible timer can help volunteers see what needs watering and when, including during busy weeks or holidays.
This guide explains how to match methods to different parts of a community garden, plan around shared taps and access, and create a maintenance routine volunteers can follow. You’ll also learn what to compare when choosing drip kits, sprinklers, timers and related components, so your watering setup can support the garden as it grows.
Key Takeaways
- Build irrigation solutions for community garden projects around mapped zones, shared water access and a watering routine volunteers can follow.
- Match drip irrigation, Drip-Line, micro-jets or sprinklers to the area and plants they need to water.
- Keep drip and micro-jets on separate pipe runs because they operate at different flow rates.
- Compare each kit’s stated plant and zone capacity with the garden’s layout before choosing a system.
- Use specialist advice and suitable products to plan a watering setup that can adapt as the garden develops.
Why irrigation solutions for community garden projects need a shared plan
A community garden irrigation solution is a planned way to deliver water across shared growing areas, rather than relying on whoever happens to be on site with a hose. Good irrigation solutions for community garden projects begin with a clear picture of what grows where, how water reaches each area and who is responsible for routine checks. That structure makes watering easier to manage when volunteer availability changes.
Planning doesn’t mean giving every plant the same amount of water. It means establishing a consistent routine while allowing for differences between crops and locations. A sunny raised bed may dry out sooner than a shaded border, while containers can need attention sooner than plants growing in the ground. Dividing the garden into zones helps the group choose a suitable method and routine for each area.
What makes watering a community garden different?
Responsibility is shared, but volunteer time rarely follows a fixed schedule. A simple, written routine helps someone new take over without guessing which areas need attention. Common zones include raised beds, borders, containers and lawn, each with different watering considerations.
Sun exposure, planting density and soil all affect how quickly an area dries. For example, closely planted vegetables in an exposed bed may have different needs from established plants in a shaded border. Understanding the different types of irrigation can help the group compare ways to deliver water, but the garden’s layout and planting should guide the choice.
What should the project agree before choosing equipment?
Start with a shared map. Mark growing areas, the water source, access points and paths volunteers need to keep clear. Garden layout ideas and plans can help the group organise the space before deciding where watering lines might run. Mark sunny and shaded spots too, so the plan reflects growing conditions across the site.
Then agree a few practical responsibilities:
- Who checks that the system is working as planned?
- How should volunteers report leaks, blocked outlets or dry patches?
- Where will the watering routine and zone labels be kept?
Keep the map and instructions somewhere volunteers can find them, and use clear names for zones, such as “north beds” or “container area”. If the group is considering drip options for shared beds, the Claber drip irrigation range offers products to compare with the site plan. Agreeing these basics first helps the project choose equipment that fits the garden, rather than choosing by product capacity alone.
How community garden irrigation methods deliver water to different zones
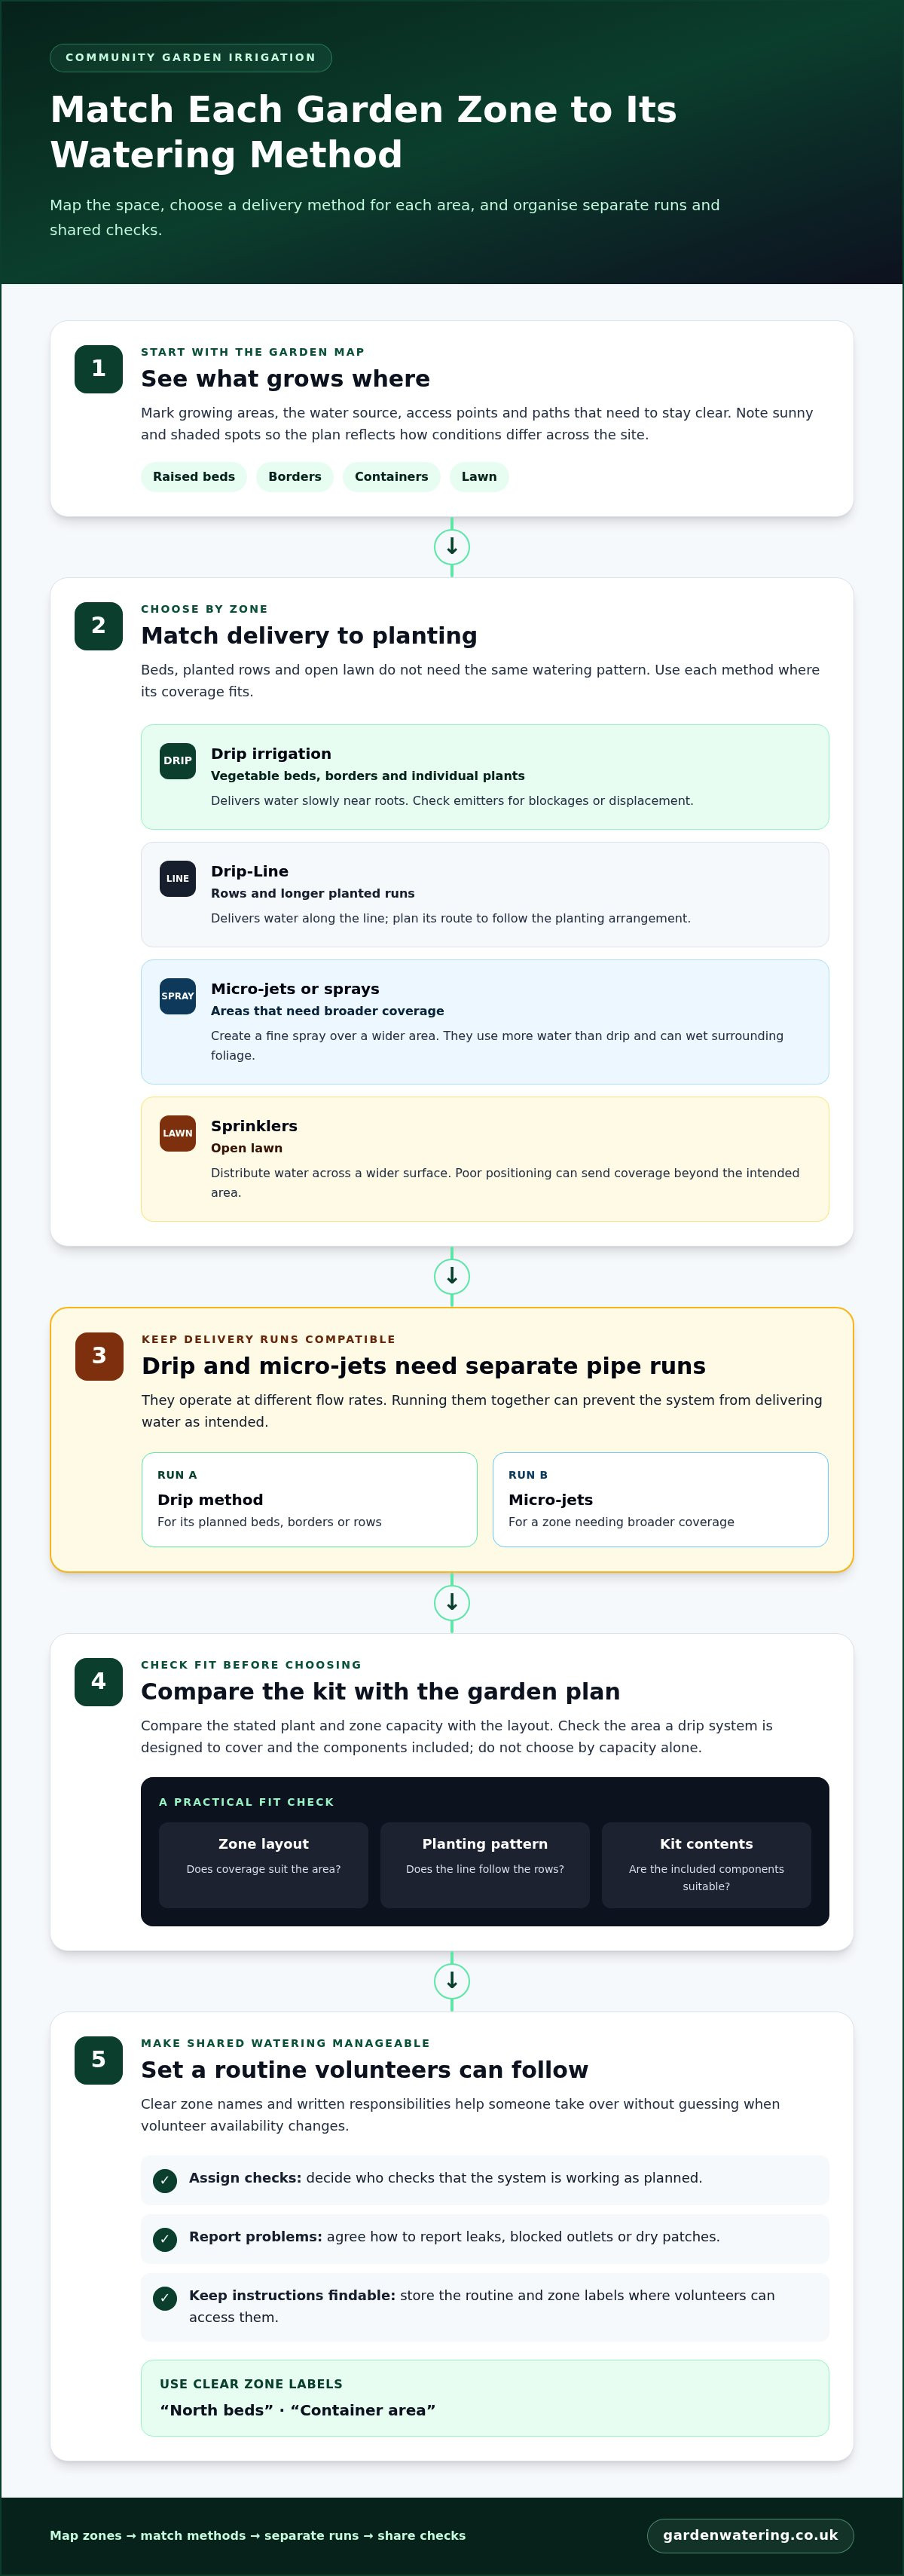
Choose a watering method according to how plants are arranged and how broadly water needs to reach. Drip irrigation delivers water slowly near plant roots, while micro-jets create a wider spray and use more water. Sprinklers cover open areas such as lawns. Matching each method to its zone helps avoid treating a row of vegetables, a border and a lawn as if they have the same watering needs. The University of Georgia Extension’s overview of community garden irrigation methods also compares options such as drip, hand watering and overhead sprinklers.
| Method | Suitable area | Delivery pattern | Practical limitation |
|---|---|---|---|
| Drip irrigation | Vegetable beds, borders and individual plants | Slow delivery near roots | Emitters need checking for blockages or displacement |
| Drip-Line | Rows and longer planted runs | Water delivered along the line | Layout needs to follow the planting arrangement |
| Micro-jets or sprays | Areas needing broader coverage | Fine spray over a wider area | Uses more water than drip and can wet surrounding foliage |
| Sprinklers | Open lawn | Water distributed across a wider surface | Coverage can extend beyond the intended area if poorly positioned |
When are drip irrigation and Drip-Line a practical fit?
Drip systems suit beds, borders and rows where plants grow in defined positions. Drip-Line can follow a planted row, while a kit with adjustable drippers can direct water to individual plants at different positions. For example, a group could run Drip-Line along a vegetable row or place adjustable drippers near individual plants in a mixed bed. Compare drip irrigation systems by the area they are designed to cover and the components included.
When should a project consider sprays, micro-jets or sprinklers?
Micro-jets produce a fine spray over a wider area than individual drip emitters, so they can suit planting that benefits from broader coverage. Sprinklers are more appropriate for open lawn than for closely planted beds, where water may land outside the target area. Match the method to the zone instead of using lawn coverage as a substitute for targeted bed watering.
Never combine drip and micro-jets on the same pipe run. They operate at different flow rates, so running them together can prevent the system from delivering water as intended. Separate pipe runs let each method operate appropriately for its area. This distinction is central to choosing practical irrigation solutions for community garden projects: plan each run around one delivery method, then match that method to the planting. Compare drip systems for options designed for beds and planted rows.
How to compare irrigation options for a shared garden project
Compare systems against the way your group works, not just the number of plants in the garden. Manual watering keeps control in volunteers’ hands and can suit a small area or occasional top-ups, but it depends on someone being present and following the agreed routine. A compatible timer can schedule watering and make regular tasks easier to coordinate when volunteers are busy or away.
Before selecting equipment, count plants and identify how many distinct watering zones the garden needs. Then compare those figures with each kit’s stated capacity and check whether its included components suit the layout. Timer arrangements vary: some kits include a timer, while others are timer-compatible and require one separately. Make this distinction when comparing options.
How should a group compare capacity, zones and expandability?
Use capacity as an initial guide. The Claber Orto Drip Kit is designed for up to 60 plants across six zones, while the Claber Terrazzo Drip Kit is designed for up to 50 plants. The Claber Logica Drip Kit includes a timer and is designed for up to 20 plants. These stated capacities help shortlist options by scale, but the right fit still depends on how plants are spaced and grouped.
A kit’s stated capacity is a planning guide, not a guarantee that it will suit every garden layout. A plant count alone won’t show whether plants are clustered in one bed or spread across several areas. Map the planting, compare the number of zones and check which components are included before deciding. If the garden may change, note possible future beds in the plan and compare them with the kit’s stated capacity and expandability.
Which shared-garden needs make a timer or simple kit useful?
A timer can help volunteers keep to a scheduled routine, provided it’s compatible with the watering system. A kit that includes a timer offers a different starting point from one that requires a separate compatible timer. Check the listed contents and match the system to the group’s routine instead of assuming all timers and components work together.
For a compact garden with a straightforward layout, a simple system can be easier to explain and hand over. Label its zones clearly and record the routine in a shared place, so the next volunteer knows what to check without relying on one person’s memory. More zones can separate areas with different needs, but they also make clear labelling and routine checks more important.
Garden irrigation timers provide a useful starting point when comparing scheduling options alongside the chosen system. These practical checks help narrow down irrigation solutions for community garden projects that fit both the planting and the volunteers who care for it.
How to plan, organise and maintain a community garden watering system
A practical plan gives volunteers a clear route from the water source to each growing area and makes routine checks part of the job. Use this five-step workflow to turn the garden map into a system people can understand and maintain:
- Map the zones. Mark beds, borders, containers and lawn, noting which areas need different watering methods.
- Identify water access. Record shared taps, access routes and any points volunteers need to reach or keep clear.
- Choose methods. Match each zone to a suitable approach, such as drip irrigation for planted beds or sprinklers for open lawn.
- Lay out lines. Plan where pipes and lines will run, keeping each watering method on its own appropriate run.
- Assign checks. Decide who will inspect the system and how they’ll report faults or dry areas.
For drip systems, a pressure reducer is strongly recommended to help protect drippers and fittings. Include it in the plan rather than treating it as an afterthought. These steps make irrigation solutions for community garden projects easier to manage as planting and volunteer responsibilities change.
How can volunteers make the system easier to manage?
Give each area a clear label, then keep a simple diagram near the shared growing space. A handover note can record watering schedules, shut-off points and how to report problems. Ask volunteers to make routine visual checks for leaks, disconnected lines and blocked emitters. Clear instructions help the next person respond without tracing the whole system or relying on a verbal handover.
Keep the routine practical: note which zones were checked, record any issue and pass unresolved problems to the person responsible for the next check. A brief written record can help the group spot recurring faults and keep maintenance consistent.
What UK water-use conditions should a community garden consider?
Drip irrigation is generally exempt from UK hosepipe bans, but that doesn’t mean every system is automatically permitted during a restriction. Rules can depend on the local water company and the current notice. Before using irrigation during a ban, check the relevant water company’s current restrictions and any conditions that apply to the garden and system.
For broader planning context, a guide to garden watering systems can help groups consider how different system types fit their site. Keep local water-use requirements in the volunteer notes, so everyone follows the same guidance.
Once the map, routine and checks are agreed, explore irrigation products for your garden and compare options that suit the project’s zones and watering plan.
Choosing irrigation products for a community garden with Garden Watering
The right product choice depends on the garden’s layout, the planting plan and the routine volunteers can maintain. A kit designed for several zones may suit a shared vegetable garden, while a smaller option could be a better starting point for a compact group of beds. Garden Watering is a UK specialist retailer with over 15 years of experience advising customers on garden watering, helping groups compare products in the context of their growing areas.
Use stated plant capacity as a first filter, not the only measure. Count the plants in the areas you want to water, note how they’re arranged and compare that layout with the kit’s intended use. A kit’s capacity doesn’t mean it will suit every site or planting arrangement.
Which confirmed kit examples may suit shared growing areas?
The Claber Orto Drip Kit is designed for up to 60 plants across six zones, making it an option to consider for a multi-zone vegetable garden. It’s timer-compatible, but the timer isn’t included, so factor that into the project’s watering plan if scheduled operation is a priority. Explore Claber drip irrigation options when comparing kits for multiple growing areas.
The Claber Terrazzo Drip Kit is designed for up to 50 plants on terraces, patios and flower beds. Its stated capacity may suit planting spread across these types of areas, but compare the actual layout and plant positions before choosing.
The Claber Logica Drip Kit is designed for up to 20 plants and includes a built-in timer. Its expandable design can suit a project planning a smaller initial setup with room to develop. Compare its intended capacity and timer with the group’s current planting and watering routine.
How should the project choose a realistic first phase?
Start with the beds or zones the group can manage consistently, rather than trying to automate every part of the site at once. This gives volunteers a practical way to learn the system and keep checks focused. As the planting plan develops, reassess which areas need watering support and what components may suit those zones.
Before selecting a kit, compare its stated plant capacity with the real arrangement of plants. A bed with plants spaced in rows may have different requirements from several smaller beds with varied planting. Note whether the kit includes a timer or whether scheduled watering depends on a separate compatible timer. These details help set realistic expectations and avoid choosing by headline capacity alone.
Garden Watering’s specialist product advice can help you identify suitable components for your layout and first phase. Explore garden watering kits and compare options for the areas your volunteers are ready to manage.
Give your garden a watering plan that can grow with it
Your community garden will change as planting shifts, new volunteers join and growing areas develop. Treat the watering plan as a working document: review it when the layout changes, and update labels and handover notes so everyone can follow the same approach. That small habit helps your irrigation solutions for community garden projects stay practical beyond the initial setup.
Choose a manageable first step, such as setting up watering for one priority area, then build on what the group learns through regular use. A system volunteers understand and can maintain is more useful than a complicated setup that’s difficult to hand over.
Garden Watering offers specialist product advice to help community groups compare suitable watering options for their plans. Explore garden watering kits for your community project and take the next step towards a system that supports your garden as it grows.
Frequently Asked Questions
Can a community garden use a rainwater butt with an irrigation system?
A rainwater butt may be usable with an irrigation system, but suitability depends on the water source, system layout and equipment compatibility. Plan where the butt will sit and how water will reach each zone before selecting components. A layout can guide the project, but it doesn’t guarantee that every kit connects directly to every tank. Refer to the equipment details when planning the connection.
How much water does a community garden irrigation system use?
There’s no universal daily amount. Water use varies with plant type, weather, soil, the area being watered and the schedule. For irrigation solutions for community garden projects, record actual use alongside the zones being watered, then review it as conditions change. For example, note whether a bed needs less frequent watering after cooler, wetter weather. Always follow any current restrictions set by your local water company.
Can drip irrigation be used during a UK hosepipe ban?
Drip irrigation is generally exempt from UK hosepipe bans, but this is subject to local water-company rules. Restrictions and conditions can vary between areas and may depend on the current notice, so don’t assume an exemption applies everywhere. Before operating the system during a ban, check the current conditions published by the water company responsible for your area. Follow any conditions that apply to your garden and equipment.
What happens if drip emitters and micro-jets share the same pipe run?
Drip emitters and micro-jets operate at different flow rates, so they must not be combined on one pipe run. Mixing them can prevent the system from delivering water as intended. Keep the methods on separate runs, and plan each run around the watering needs of its zone. Adjusting the layout doesn’t make combining them suitable; separation is the practical approach for a system using both methods.
Do community garden irrigation kits include a timer?
Timer arrangements vary by kit, so check the listed contents before choosing. The Claber Logica Drip Kit includes a built-in timer, while the Claber Orto Drip Kit is timer-compatible but doesn’t include one. This distinction matters if volunteers want scheduled watering from the outset. A compatible timer may be an additional component for some systems, so don’t assume a kit includes a controller unless its specifications say so.
How can a community garden protect irrigation lines from accidental damage?
Map pipe routes and keep lines clear of regular foot traffic, digging areas and places where tools are often used. Make the route visible on a shared diagram so volunteers know where lines run before starting garden work. After digging, moving containers or other maintenance, inspect nearby sections for displaced or damaged parts. These routine checks can help the group spot problems early, though no layout makes equipment damage-proof.
Can a community garden expand its irrigation system later?
Some kits are described as expandable, including the Claber Logica Drip Kit and Claber Drip Irrigation Starter Kit, but expansion depends on the garden layout and compatible components. Before choosing a first phase, note which beds or zones may be added later and leave the plan flexible enough to account for them. Don’t assume every system can be extended without limits; compare the equipment details with the project’s likely future needs.
`-
Posted in
allotment gardening, community gardens, drip irrigation, garden irrigation, garden timers, irrigation solutions for community garden projects, UK gardening, volunteer gardening, water management