Drip Irrigation Kits for Pots: The Ultimate 2026 Guide
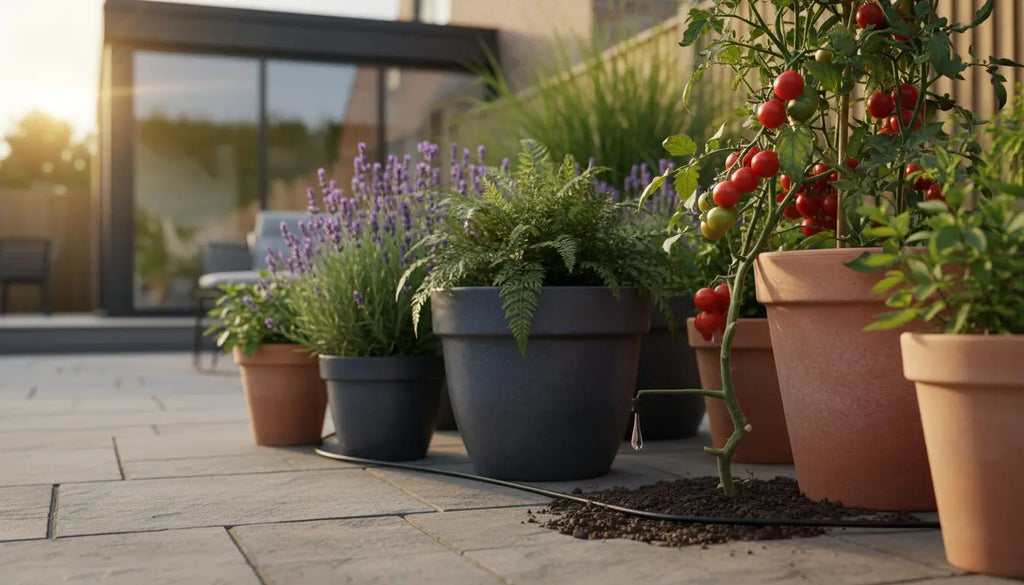
Drip Irrigation Kits for Pots: The Ultimate 2025 Guide
Are you tired of the daily watering rota for your container garden? Do you worry about your potted plants when you're on holiday, only to return to wilted leaves and dry soil? Keeping containers perfectly hydrated can feel like a constant, time-consuming chore, and the fear of forgetting a watering session is a frustration many gardeners share.
Imagine your pots receiving the perfect amount of water right at the roots, every single day, with minimal effort from you. This is the efficient, reliable solution a drip irrigation kit for pots provides. As irrigation specialists, we're here to demystify the process. In this comprehensive 2025 guide, we’ll provide expert advice you can trust, showing you exactly how to choose, install, and maintain the perfect system for your space. Prepare to save time, conserve water, and enjoy thriving, healthy plants all year round-with complete peace of mind.
Key Takeaways
- Discover why direct-to-root watering is the most efficient solution for keeping your potted plants consistently healthy with minimal effort.
- Learn how to assess your specific setup-from the number of pots to your water source-to select the perfect drip irrigation kit for pots.
- Follow our straightforward, 5-step guide to install your new system quickly and confidently, even with no prior experience.
- Go beyond the basic setup with expert tips on emitter placement, scheduling, and maintenance to ensure your container garden thrives.
Why Use a Drip Kit for Your Potted Plants?
For anyone who loves growing in containers, a drip irrigation kit for pots is the ultimate solution for keeping your plants thriving with minimal effort. Instead of the 'flood and famine' cycle of hand watering, this efficient system delivers water precisely and slowly, straight to the roots where it's needed most. This method, known as Drip irrigation, avoids wetting the foliage, which can lead to disease, and prevents the significant water loss that occurs from evaporation and runoff when using a hose or watering can.
To see just how simple and effective these systems are, this video provides an excellent guide:
Imagine reclaiming your evenings and weekends, free from the daily chore of watering every single pot. An automated drip system handles this for you, ensuring your plants receive the exact amount of water they need, on a schedule you set. This consistency is not just convenient; it's transformative for your garden's health. Better still, you can finally go on holiday with complete peace of mind, confident that your patio paradise will be just as lush and healthy when you return.
Healthier Plants, Guaranteed
Plants flourish with consistency. A drip system eliminates the stress caused by the cycle of drying out and then being waterlogged. By keeping the soil consistently moist (but not saturated), you provide the perfect environment for growth. Furthermore, because water is applied directly to the soil:
- Foliage stays dry, significantly reducing the risk of common fungal diseases like blight and powdery mildew.
- Roots grow stronger and deeper, as the slow, steady drip encourages them to seek out moisture throughout the pot.
Save Water, Save Money
A high-quality drip irrigation kit for pots is one of the most effective ways to conserve water in the garden. By delivering water directly to the plant's root zone, you can reduce water usage by up to 70% compared to traditional hand watering with a hosepipe. During summer hosepipe bans, this targeted approach ensures your containers can still be cared for. This efficiency not only helps the environment but can also lead to noticeable savings on your water bill. Plus, you can say goodbye to wasteful runoff staining your patio or balcony, as every drop is put to good use.
Understanding the Key Components of a Pot Watering Kit
At first glance, a box full of tubes and connectors can seem daunting. But in reality, a drip irrigation kit for pots is a simple, logical system designed to make your life easier. Think of it like a model railway track, but for water; a main line runs around your patio, with smaller tracks branching off to deliver water exactly where it's needed. Most quality kits from brands like Hozelock contain everything you need to get started, ensuring your plants receive consistent, reliable watering with minimal effort from you.
The 'Brains': Timers and Connectors
This is the control centre of your system, connecting to your water source and automating the entire process. These components are vital for a 'set-and-forget' solution.
- Tap Connector: A simple but crucial piece that securely attaches the system to your outdoor tap, creating a leak-free starting point.
- Water Timer: This is the key to automation. Simple dial timers allow you to set watering duration and frequency, while digital models offer more precise scheduling. A timer ensures your plants are watered consistently, even when you're on holiday.
- Pressure Reducer: An essential component that lowers your home's mains water pressure to a gentle, steady flow suitable for drip irrigation. This prevents connectors from popping off and protects the drippers from damage.
The 'Arteries': Tubing
The tubing is the network that carries water from the tap to each individual plant. A well-planned layout using the right tubes is the foundation of an efficient system.
- Main Supply Tube (13mm): This is the backbone of your drip irrigation kit for pots. This wider pipe runs from the tap connector around the main area you want to water, acting as the primary water carrier.
- Micro Tube (4mm): This much smaller, flexible tubing branches off the main supply line. You run a piece of this thin pipe into each individual pot or container, delivering water right to the soil.
The 'Nozzles': Drippers and Emitters
These small but mighty components are responsible for the final, precise delivery of water to your plants' roots. Choosing the right one ensures every plant gets exactly what it needs to thrive.
- Pressure Compensating (PC) Drippers: These are highly recommended as they deliver the same amount of water regardless of their position in the system. This means the first pot in the line gets the same hydration as the last.
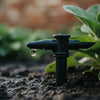
- Adjustable Drippers: Perfect for container gardens with diverse plants. They allow you to increase or decrease the flow to individual pots, so a thirsty tomato plant can get more water than a drought-tolerant succulent next to it.
- Inline vs. End-of-Line Drippers: An end-of-line dripper sits at the very tip of the micro tube. An inline dripper pierces the tube, allowing you to water several plants along a single run of micro tubing-ideal for a row of window boxes.
How to Choose the Right Drip Irrigation Kit for Your Pots
Finding the perfect match for your container garden is simpler than you think. While you can buy individual components, starting with a complete drip irrigation kit for pots is by far the easiest and most cost-effective approach. It ensures you have all the compatible parts you need from the get-go. To select the right one, simply walk through this quick checklist.
Assess Your Garden: Number of Pots and Layout
Before you browse, take a moment to survey your space. Answering these questions will quickly narrow down your options:
- How many pots do you have? Kits are designed to water a specific number of containers, such as the Hozelock 20 Pot Watering Kit. Count your pots to ensure you choose a kit with enough drippers.
- What is the distance to your furthest pot? Measure from your water source to the last container to make sure the main supply hose is long enough.
- Might your garden grow? If you plan to add more pots in the future, look for a system that is easily expandable.
Consider Your Water Source
How you connect your system is a crucial factor. Most homes in the UK will use a standard outdoor tap, which is the simplest connection for any kit. However, there are excellent solutions for other situations:
- Water Butt/Rain Barrel: An environmentally friendly option. To use a water butt, you will need either a water butt pump to create sufficient pressure or a gravity-fed system where the butt is raised at least one metre off the ground.
- Balcony or No Outdoor Tap: Don't worry, you can still automate your watering. Gravity-fed bag systems are a popular and effective solution for these spaces.
Select the Right Drippers for Your Plants
Different plants have different watering needs. A high-quality kit will offer the right drippers for your specific plants. Thirsty, fast-growing plants like tomatoes or large hanging baskets thrive with higher flow 4 LPH (litres per hour) drippers. For most other plants like perennials, herbs, and shrubs, standard 2 LPH drippers provide a slow, steady supply of water. If you have a mix of plants, the best solution is a kit with adjustable drippers, giving you complete control over how much water each pot receives.
Choosing a Water Timer
A timer is the key to unlocking the full "set-and-forget" benefit of drip irrigation. There are several types:
- Mechanical Timers: Simple, reliable dial timers for basic daily watering schedules.
- Digital/Electronic Timers: Offer precise control, allowing you to set multiple watering times per day or on specific days of the week.
- Smart/Bluetooth Timers: Give you ultimate control from your smartphone, perfect for adjusting schedules while on holiday.
With these points in mind, you are ready to find a system that will keep your container garden healthy and vibrant with minimal effort. Browse our range of Hozelock drip irrigation kits for pots.
Step-by-Step: Setting Up Your Drip System for Pots
One of the best features of a modern drip irrigation kit for pots is how simple it is to install. You don’t need any special plumbing skills or complicated tools-just a bit of planning and a free afternoon. This guide breaks the process down into five manageable steps, empowering you to set up an efficient watering solution that will help your container garden thrive with minimal effort. Follow along, and you'll have your system running in no time.
Step 1: Plan Your Layout
Before cutting any tubing, lay the main 13mm supply tube on the ground, running it along the path of your pots and containers. This helps you visualise the final setup and measure the exact length of tubing you'll need. Decide on the best spots to branch off with smaller 4mm micro tubing to reach each individual pot. It's a simple but crucial step for an organised and efficient system.
- Expert Tip: Let the coiled tubing sit in the sun for an hour before you start. The warmth will make it much more flexible and easier to work with, preventing kinks.
Step 2: Connect to the Tap
Connecting the system to your water source is straightforward. All the components are designed to screw together by hand for a secure, watertight seal. Start by attaching the tap connector to your outdoor tap. Next, screw your water timer onto the connector, followed by the pressure reducer. The pressure reducer is essential as it ensures water flows at a slow, controlled rate suitable for drip irrigation. Finally, push the main 13mm supply tube firmly onto the outlet of the pressure reducer.
Step 3: Run Tubing and Install Drippers
With your system connected, it's time to run the main supply tube along the planned route. Cut the tube to the desired length using sharp scissors or pipe cutters for a clean edge. Secure it in place with wall clips for a tidy installation on a wall or patio, or use stakes to hold it on the ground. Use the hole punch tool included in your kit to make clean holes in the main tube where you need to connect the micro tubing. Push a connector into each hole, attach a length of micro tubing, and push a dripper onto the other end. Place the dripper securely in each pot, positioned near the base of the plant.
Step 4: Flush and Test the System
Before you seal the system, it's vital to flush out any dirt or plastic shavings that may have entered the tubing during installation. Leave the far end of the main supply tube open and turn on the tap for a minute to let water run through freely. Once the water runs clear, turn it off and close the end of the tube with an end cap or stopper. Turn the water back on and carefully check all connections-from the tap to each dripper-for any leaks.
Step 5: Set Your Timer and Adjust
The final step is to automate your watering. Set your water timer to run for a specific duration and frequency based on your plants' needs-a good starting point is often 15-20 minutes every other day in the UK summer. For the first week, monitor your pots closely. Check the soil moisture to ensure plants are getting enough water, but are not waterlogged. You can easily adjust the timer's schedule or swap drippers to ones with different flow rates to get the watering just right for each plant.
Top Tips for Success with Potted Plant Irrigation
Setting up your system is the first step towards healthier container plants and more free time. To ensure your garden truly thrives, however, it’s worth adopting a few expert practices. These tips will help you avoid common pitfalls and get the absolute best performance from your drip irrigation kit for pots, guaranteeing lush, healthy growth for years to come.
Getting the Watering Schedule Right
The most common mistake is incorrect timer settings. Every garden is different, so use this as a starting point: begin by setting your timer to run for 15 minutes every other day. After a cycle, check the soil moisture by inserting your finger about an inch deep. If it’s soggy, reduce the duration. If it’s dry, increase it or water more frequently. For maximum efficiency, always water in the cool of the early morning or evening to minimise water loss through evaporation.
Maintenance and Winterising Your System
A little-and-often approach to maintenance prevents problems before they start. To keep your system in peak condition, we recommend a simple checklist:
- Check Emitters Regularly: Periodically ensure each dripper is flowing freely. In hard water areas, limescale can cause blockages. A quick visual check will save your plants from dehydration.
- Protect Your Timer: Before the first frost is forecast, disconnect your water timer from the tap. Drain any water from it and store it indoors in a shed or garage to protect the internal components.
- Drain the Pipes: Open the end caps or plugs on your main supply lines to allow all water to drain out. This simple step prevents water from freezing, expanding, and cracking the pipes over winter.
Advanced Techniques for Optimal Growth
Once you’ve mastered the basics, you can refine your setup for even better results. For very large containers (over 40cm diameter), consider using two or three drippers per pot to ensure the entire root ball receives even moisture. A smart strategy is to group plants with similar watering needs onto the same supply line, allowing you to create different watering ‘zones’. For the ultimate automated garden, you can even integrate a liquid fertiliser injector into your system, which provides a steady, diluted feed every time you water.
Your Path to Thriving Potted Plants
As we've explored, switching to an automated watering system for your containers is a transformative step for any gardener. It not only conserves water and saves you precious time but also promotes stronger, healthier plants by delivering moisture precisely where it's needed. By understanding the key components and following a few simple setup steps, you can easily install a high-quality drip irrigation kit for pots and say goodbye to the daily chore of hand-watering.
Ready to find the perfect solution for your patio, balcony, or greenhouse? At Garden Watering, we're your dedicated irrigation partner. With over 15 years of irrigation expertise and as a specialist Hozelock supplier, we provide expert advice you can trust to help you select the ideal system for your needs.
Find the perfect drip irrigation kit for your pots today.
Embrace the simplicity and efficiency of drip irrigation and watch your container garden thrive like never before.
Frequently Asked Questions
How many pots can I water with one drip irrigation kit?
The number of pots a kit can water depends on its size. For example, the popular Hozelock 20 Pot Watering Kit is designed for up to 20 containers. Most starter kits provide enough tubing and drippers for 15 to 25 pots. The key is the length of the supply hose and the number of emitters included. We always recommend checking the product description for a precise count, ensuring you have the right solution for your patio or garden to thrive.
Do I need good water pressure for a drip irrigation system to work?
No, quite the opposite. Drip irrigation is a low-pressure system designed to work efficiently with standard household water pressure. In fact, most kits include a pressure reducer, which attaches to your tap to ensure a slow, steady flow. This is what makes drip irrigation so efficient, delivering water directly to the roots without the high pressure needed for lawn sprinklers. This ensures gentle, effective watering for your container plants.
Can I use a drip irrigation kit on a balcony without an outdoor tap?
Yes, it is possible to set up a system without a dedicated outdoor tap. The most effective solution is a gravity-fed system connected to a water butt or another large reservoir. By placing the water source higher than your pots, gravity provides the necessary pressure to feed the drippers. Some brands offer kits specifically designed for this purpose, or you can use a universal tap connector to adapt a standard kit for use with an indoor tap temporarily.
Is it difficult to add more pots to the system later on?
Not at all. One of the greatest benefits of modern drip irrigation systems is their modular design, which makes expansion incredibly simple. To add a new pot, you simply cut the main supply tube, insert a ‘T’ connector, and run a new length of micro-tubing to your new plant. We offer a wide range of individual components and extension kits, allowing your system to grow alongside your container garden with minimal effort.
How do I stop my drip irrigation system from clogging up?
Preventing clogs in your drip irrigation kit for pots is straightforward with a little maintenance. Most high-quality kits include a filter that attaches between the tap and the system; always ensure this is installed and clean it periodically. If you use a water butt, keep it covered to prevent debris from falling in. At the start and end of the season, it’s good practice to flush the system by removing the end caps and running water through the pipes.
What's the difference between a Hozelock kit and other brands?
As specialists, we find Hozelock excels in providing high-quality, user-friendly systems that are exceptionally reliable. Their kits typically include everything you need, with clear instructions perfect for those new to irrigation. A key advantage is the wide availability of spare parts and expansion packs throughout the UK, making them a practical long-term investment. While other brands offer excellent solutions, Hozelock's reputation for durability and ease of use makes them a trusted choice for UK gardeners.
`-
Posted in
drip irrigation kit for pots